Sunday, January 17, 2021

Sold House with Homeowner's Binder and Full Plant List

We moved! After years of building our 0.13 acres from the ground up, we built a new construction house down the street and we're doing it all over again. Much more on the new house to come, I already have a lot of projects in mind, but to close the book on the previous house I just wanted to reflect - and to talk about this homeowner's binder idea because I'm so pleased with myself. 

In our property listing, house photos, and open house information, the landscaping was a selling point. This blog was a huuuuge help to create a Homeowner's Binder to show off at the open house. The idea was to make the house feel as brand new as possible for potential buyers - we even had the original flyer for our house layout called The Ashton by Arbor Homes. 

selling house with home owner binder during showing

Having a Homeowner's Binder out during the showings also led to a bunch of comments like "they're so organized, you can tell the place is well taken care of" because the kind of person who puts together a binder like this is the kind of person who cleans and keeps up with maintenance. So it sends a good impression. 

color and style guide for house showing binder

list of plants and flowers for binder when showing house

give new home buyers list of paint colors for piece of mind

In the binder I included a section called Colors and Styles, and a section called Trees, Flowers, and Plants by Name. After that I included any building permits, lot surveys, and appliance manuals I could find using these clear plastic page inserts. These things came in so handy because I didn't have to three hole punch everything I just tucked it into the sleeve. I also threw in a few plant tags from the newer purchases (with the price tag still on so they know the tree out front isn't a junker it was $150). 

We included paint colors, the make and model of the fence, and anything we felt would help the buyer feel more secure and confident coming into their new house. 

Saturday, September 5, 2020

How I Turned My Landscaping iPhone Photos Into Affordable Canvas Wall Art

Back in 2019 I changed offices at work and had the opportunity to "spruce" things up a bit. The furniture is all standard and I'm not allowed to change anything, so I wanted to add some color and remind myself of my happy place out in the yard at home. I was able to print some super affordable custom canvas wall art using photos I took of my own yard on my iPhone - nothing fancy! It turned out super great and I got a lot of compliments at work. People couldn't believe 1.) that I took the photos myself, and 2.) that it was so inexpensive. 

I knew I wanted a variety of textures and colors, but I didn't want photos of flowers necessarily. I didn't want people to think I was narcissistic and just have photos of my yard hanging on my wall, so I went with detailed shots that you can't really tell are from my yard personally and could just be stock photos. I think that's why people can't believe they're mine because they are not the kind of photos most people take of their yard. 

I ended up going with these photos:

Rhamnus frangula ‘Fine Line’ Buckthorn

Asarum europaeum (European Wild Ginger)

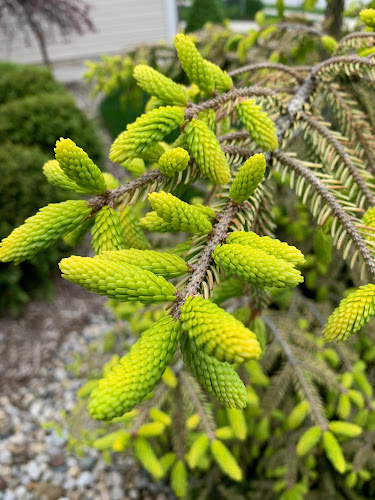
Picea orientalis 'Skylands' oriental spruce new growth


I used a website called Easy Canvas Prints (not sponsored) because they let you choose custom dimensions for your canvas wall art. I decided to do a triptych (fancy way of saying 3 pieces of art that hang as a set together) with each one being 12 inches wide and 36 inches tall. 

The custom 12 inch by 36 inch canvases were approximately $28 each. Shipping was $12 and tax was $7. This site is hilarious, they make it look like you are saving 93% but they've had that promotion going on for years. Either way, the ACTUAL price is still a bargain. If you have certain dimensions you want in canvas but don't see them on a site you are looking at, try a custom option like this, I was able to get exactly what I wanted and it turned out great. The print quality was fantastic even with iPhone photos, very good detail. 

I had them ship directly to my office so I wouldn't have to carry them in my car and up the stairs. Let UPS do the work! They arrived and I hung them with command hooks because they are very light weight. 

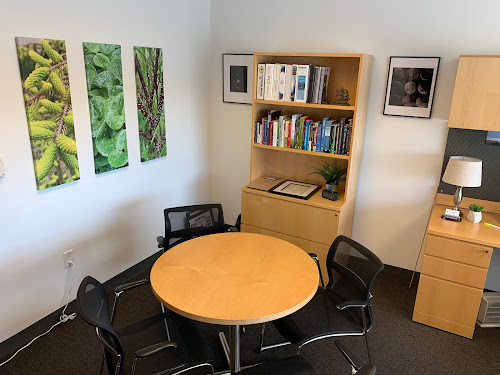
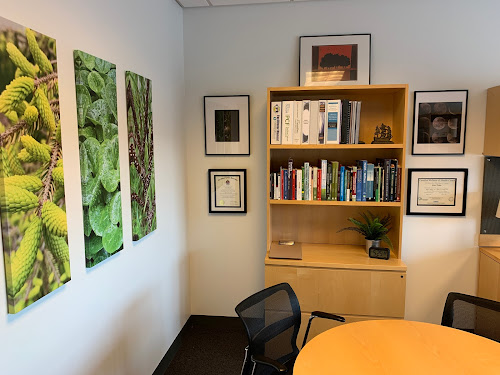
Here is the final product:

Custom dimension canvas prints from iPhone photos of plants in my yard

Set of 3 wall canvas prints of my own plant photos


Saturday, August 4, 2018

Can't Mow Between Fences, Created Pachysandra Ground Cover Bed

pachysandra ground cover bed with iris
This is the 'after' photo at the start of the following season when things have had a chance to grow in a little bit

My neighbor got a new fence for his dog (and so I don't have to look at his yard) but it's too close to my fence so a lawn mower doesn't fit between. After weed wacking it a few times, I knew he wouldn't help take care of it so I went ahead and devised a plan to turn it into a huge groundcover bed using Pachysandra even though half the space between the fence is technical his land. Here's the process I used and some photos along the way.

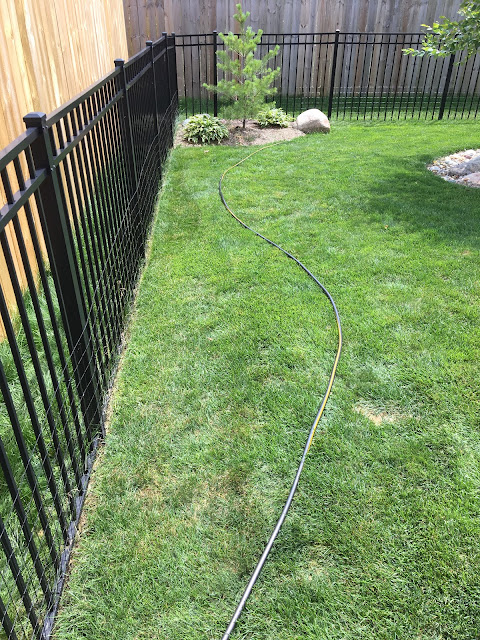
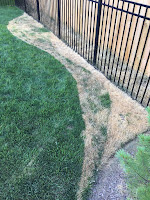
To plan out the overall shape of the bed, I used a hose on the ground to create a gentle curve. Then I used an edger to create a line along the hose, and sprayed Round Up on the grass to kill it. In previous beds, I lifted the sod and flipped it over and tried to create the bed that way, but the grass ended up growing through the sod - so this time I just decided to kill it and put topsoil and mulch over it.

Not all of the grass died completely, so I used vinegar as a touch up because it kills the grass just as well as the Round Up and it's way cheaper.

planning bed edge with hose
Planning out the shape of the bed with a hose helps visualize the gentle curves, then I edge along it to create a hard line in the ground. Some people spray paint or sprinkle flour to create a line to mark the edge.

planning bed edge with hosedead grass for new landscape bed


I was really lazy with this bed and after the grass died I didn't do a whole lot of amending the soil or tilling, I just dumped some topsoil over the dead grass and added some mulch. I spent about $72 on the Pachysandra plugs - if they weren't so expensive I would have gotten a lot more to create a full look, but I guess I can wait a few seasons for it to really fill in.

dead grass contrast clean edge landscaping bed
I love this photo, it's a little bizarre to kill off such a big patch of grass when I spend so much time and energy trying to keep the grass alive, but I like the contrast and the clean line I was able to create.

ground cover option because can't mow between fences
Here is an after photo trying to get the same camera angle. This was taken immediately after installation so the ground cover hasn't had a chance to grow in at all. I've been wanting a Buckthorn Fine Line for a while so I used that as the accent plant in the middle of the bed.

man in cutoff shirt with garden hose
Even Chris came out to help! Photo evidence!

pachysandra plugs
I didn't even realize until I looked back at this photo from about a year ago that the Buckthorn Fine Line has actually put on a good 6-8 inches of growth since I put it in. The photo at the top fo the page is the most recent.

what to plant between fence too narrow to mow
This was right after install, and before the neighbor's dog took out a few trying to dig under the fence (eye roll emoji)