Saturday, May 7, 2022

What 5 Yards of Mulch Looks Like and How Long It Took To Spread

This was my first year getting bulk mulch delivered rather than buying bags of mulch from Lowes. Like many homeowners, I had no idea how to estimate the number of cubic yards of mulch I would need (and I've seen neighbors end up with a mountain of mulch for just a few flower beds). I needed a way to estimate how much mulch I would need in cubic yards. The mulch website had a calculator on it, but when I added up all my bed dimensions it came out with a wacky number like 100 yards of mulch. 


What worked for me, and again I'm not an expert, I went to Google Maps and used the measure tool. Right click on the map and you can create a measurement. I measured the perimeter of my mulch beds around my house and then assumed a 3 foot width of the beds for the entire length on the mulch calculator. I didn't include the mulch around the trees or other beds because I assumed the measurement of the driveway and other areas where I don't have mulch would cancel out. Maybe I got lucky, but this worked out perfectly for me with 5 yards of mulch covering my beds with none left over. 


5 yards of mulch in a pile on the driveway


using google maps to estimate yards of mulch
Using Google Maps to estimate yards of mulch

The delivery driver was a pro and got most of the mulch right in the center of the tarp. It was funny when he opened the doors the mulch was packed in and stayed in the shape of the truck. I was definitely happy I used a tarp - not because I was worried about getting the driveway dirty, but because as the pile gets smaller and more spread out, it's nice to have an easy way to pool the mulch back in the middle so it's scoopable. 


mulch being delivered in truck on driveway

I did this all by myself in a weekend and it took me about 10 hours. I think it took longer than it should have because I was carefully spreading and shaping edges as I was going instead of just quickly dumping. 


Some tools that came in extremely handy (I will never spread mulch again without them!) are a pitchfork and a heavy duty wagon. The tines on the pitchfork let it easily glide into the mulch but then the mulch clumps itself together so really it's like a shovel and the mulch doesn't really fall between the tines of the fork. The heavy duty wagon spreads the weight out over 4 wheels so it doesn't leave ruts in my lawn like a wheelbarrow would. The Gorilla Cart even has a dumping action that saved me time.


The whole thing would have gone faster if I wasn't also shaping the bed as I was going, here are some more photos:


remove sod create new mulch bed

new mulch bed

Helleborus and holly with new mulch around them

The downspout by my new mulch bed is the strongest current when it rains, so I wanted to extend the downspout without making it look ugly. I tried these brown downspout extenders which are pretty good - but 2 of them don't quite get me to the edge of the bed so I added rocks. It's temporary but at least now I'm not drowning my plants and washing away all the mulch. 


Downspout extender under mulch with rocks

Thursday, June 17, 2021

New Plants Around Utility Boxes

I'm no stranger to hiding utility boxes with plants to not only make it more attractive but also make it easier to mow around. Before I did this utility box landscaping my neighbor said he was coming out with scissors to cut the grass in between the power box and internet box in the front yard. 

plants around utility boxes

utility box landscaping photos
Here is an After photo from October


At our old house, I had a great utility box combination of feather reedgrass, coneflower, iris, and asters. I wanted to try something a little different here because all of those plants die to the ground in the winter and only do a good job hiding the utility boxes for 7 months out of the year. So I wanted to do something evergreen this time but I didn't want to have to wait years for it to grow either. 

My compromise was to plant one emerald green arborvitae in the front that will eventually get 4 feet wide and hide most of the boxes from the front view, but in the meantime I wanted to hide the boxes from the side so I used one of my favorite ornamental grasses 'Northwind' switchgrass. 

'Northwind' switchgrass

I also got a few drought tolerant flowers called Gaillardia aristata 'Spintop Copper Sun' that won't really get tall enough to hide anything but they are blooming like crazy and don't need a lot of water. 

Gaillardia aristata 'Spintop Copper Sun'

I started by rounding up the grass in the shape of the bed using a hose as a guide for the shape. I waited about a week for the grass to fully die and added a very thick layer of mulch. I called 811 before the dig to mark the utility lines, but since my mulch was so thick I actually didn't even dig into the ground I just pushed the mulch aside, added topsoil and the plants are all planted above the clay soil in nice mounded topsoil and surrounded by mulch. 

arborvitae emerald green

I don't have anything in the back yet and I'd still like to add some coneflower, but for now at least I don't have to mow between the boxes and it looks a little better. The plants are so small that they aren't completely hiding anything really, not yet anyway. 

Monday, May 31, 2021

This Is How I Start a New Mulch Bed from Scratch

How do you start a brand new mulch bed over grass for the first time? Here is my method that I've used a few times but it's certainly not the only way to do it. I'll show step by step photos and talk about the pros and cons of this method compared to other ways to do it. 

The very first thing I like to do is to visualize the shape of the bed by laying out a garden hose in the shape that the bed will be in eventually. I like nice gradual curves, so a garden hose is the perfect outline to start planning, then you can step back and make sure you like it. 

Using a garden hose to plan out the shape of the new mulch bed

I'm glad I did this because when I took a step back I realized I wanted more of a concave curve at the top rather than convex to basically make the whole thing look like a kidney bean or fat boomerang. The kidney bean shape is very common in landscaping and the gradual curves are pleasing to the eye. The benefit of the curve on the high side of the yard is that water will flow around it on its way down hill. 

My next step while the hose is still in place is to just nuke everything with roundup. You could also edge around the whole thing with a half moon edger and peel up the sod, but this grass has been growing here for a few months and the sod is really hard to dig up. Plus I want as much topsoil as I can get in the new bed so I don't want to remove the sod layer I want to keep all that material in the bed and even build it up from there. 

I let the roundup start to take effect before removing the hose to make sure I have my outline. On a hot day in direct sunlight, the roundup should have a noticeable impact on the grass even in a couple hours. 

hose shape of mulch bed
Remember to rinse your hose off because now it's covered in RoundUp

The next morning it looked like this...

Shape of new mulch bed in dead grass

I did have to go back and touch up a few parts with extra grass killer, a few days later it was evenly crispy. I let it stay like this for about a week and a half - I didn't want to plant anything into a bed of roundup right away. I wonder what the neighbors thought with this big bean shape patch of dead grass. 

Shape of new mulch bed in dead grass

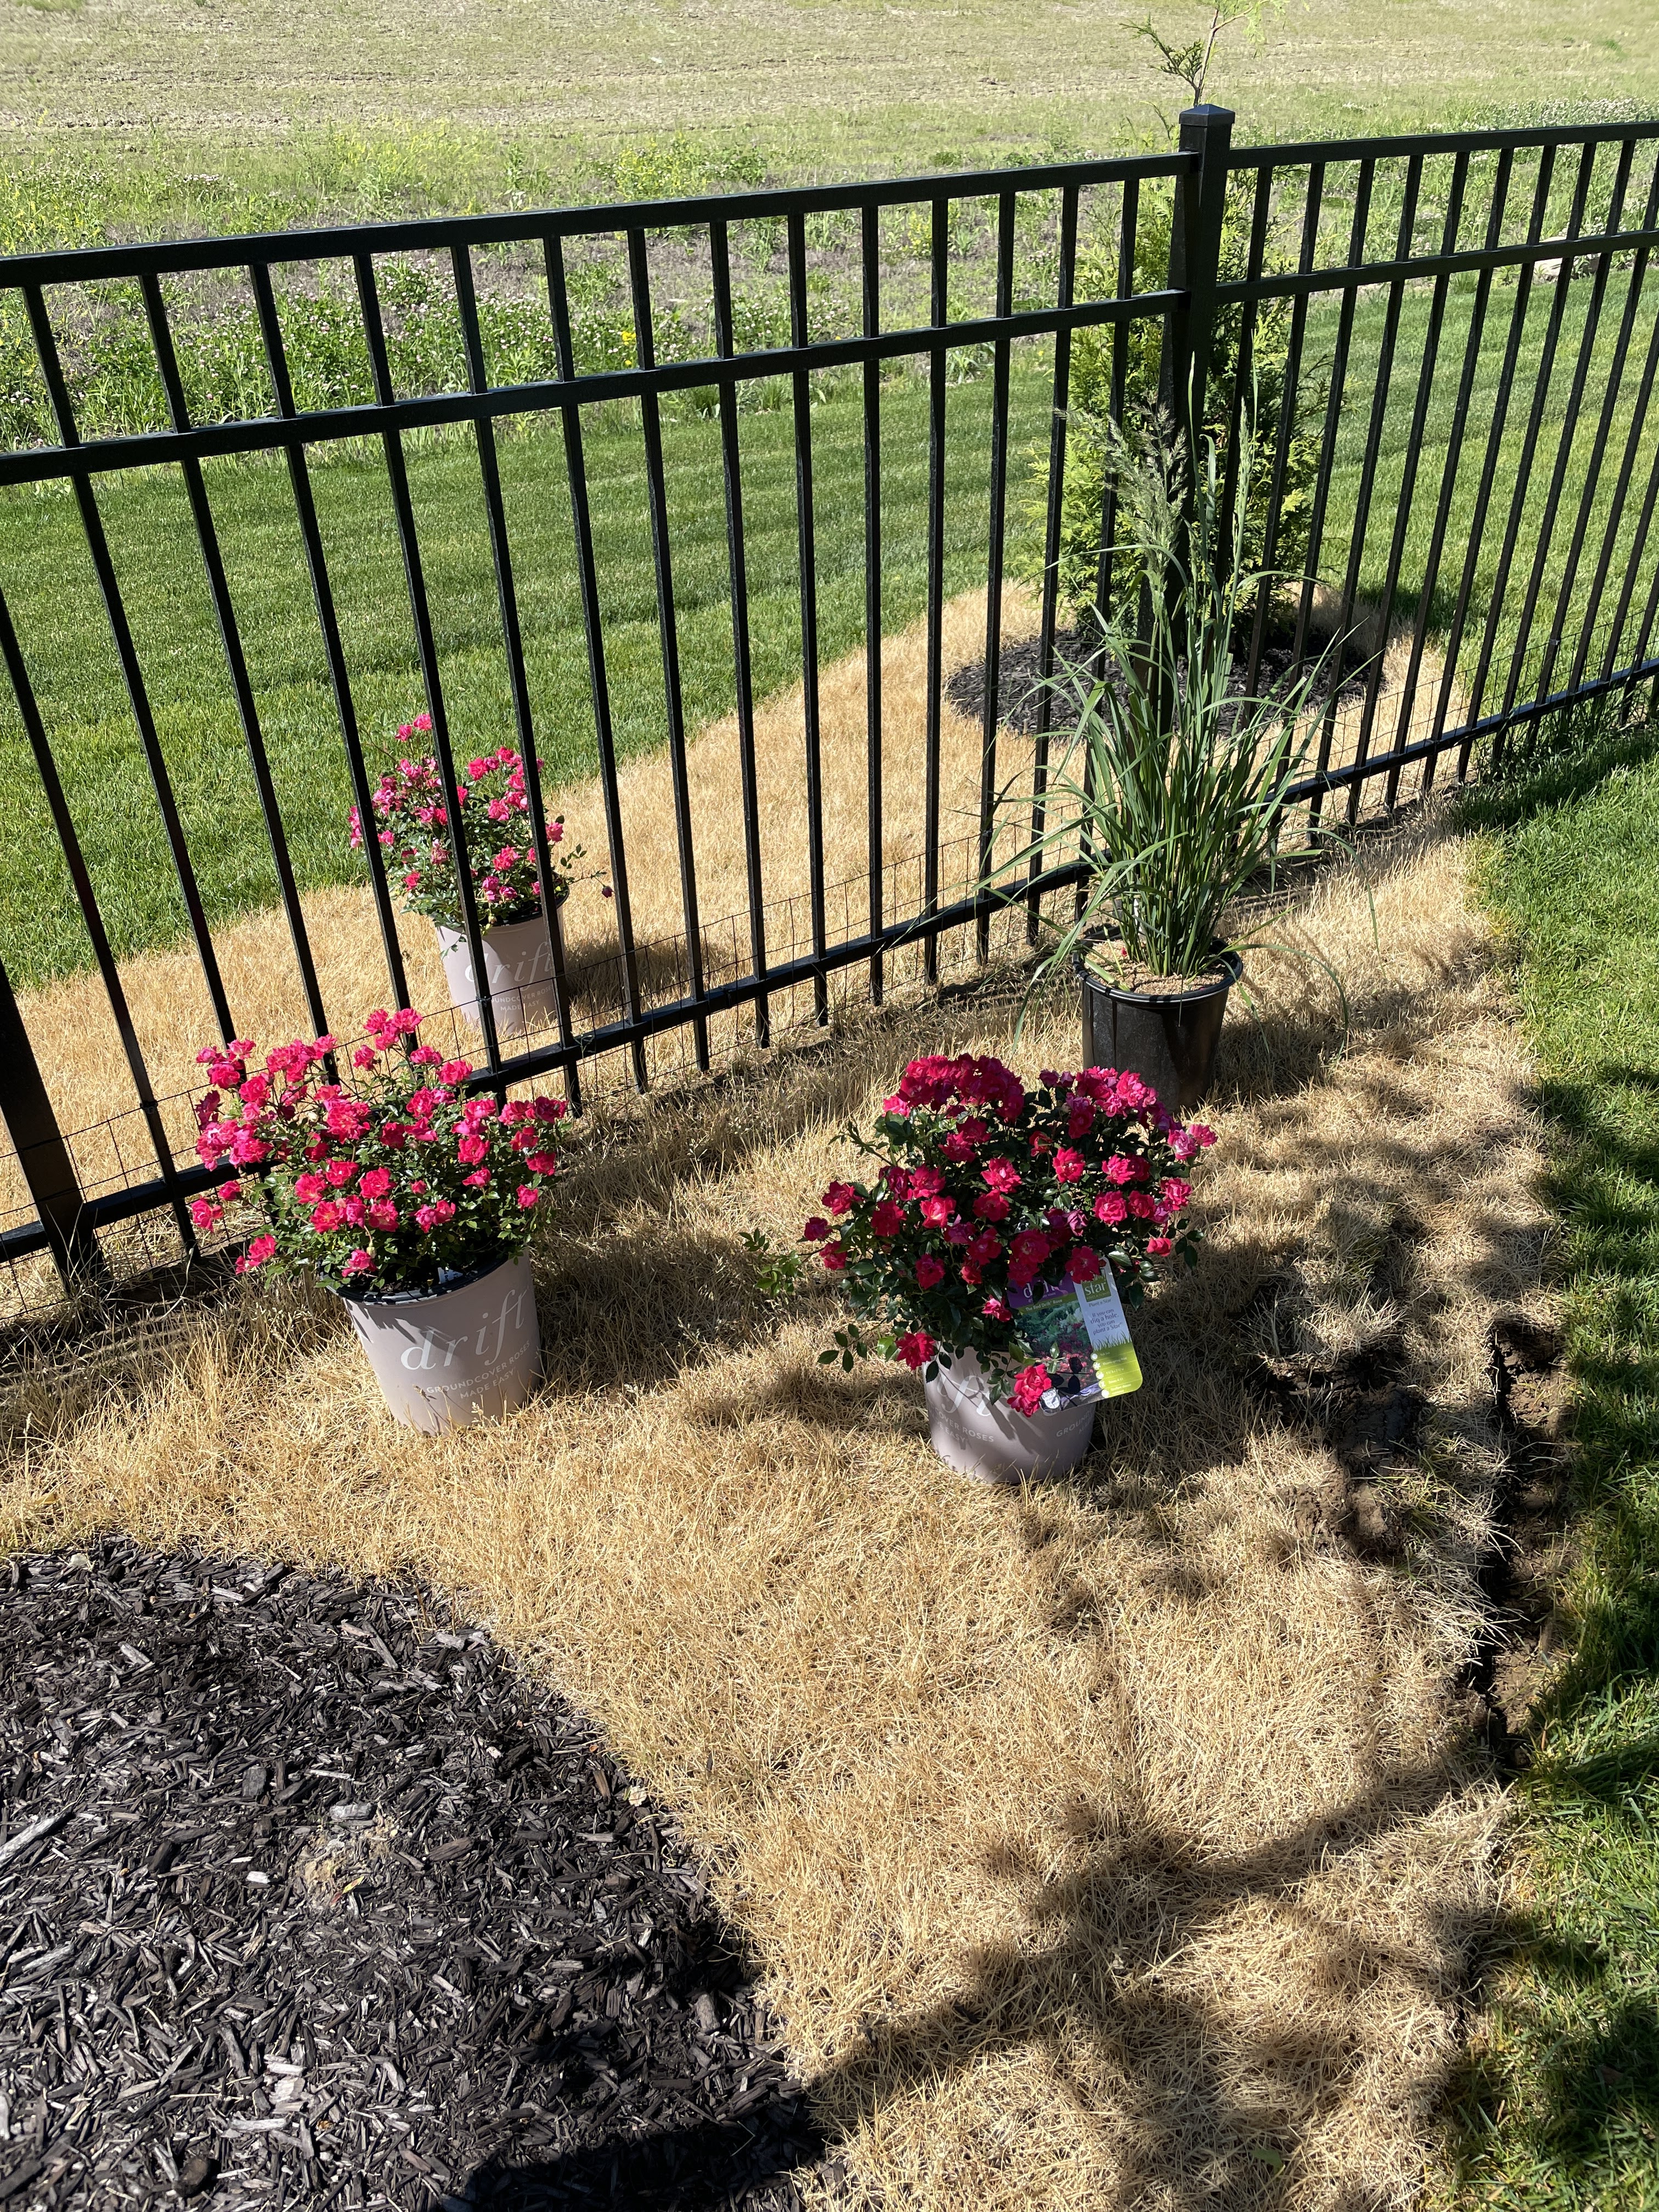
Next we bought a bunch of plants to fill the bed, in this case we got a few colors of Drift roses. Knowing I wanted to raise the bed up a little above the sod line, I dug shallow holes for the plants and mounded fresh topsoil mixed with peat moss around them. 

arranging plants in new bed shape

Having the shape of the bed outlined in dead grass made it easy to arrange the plants how I wnated them. It's at this point I also went around the entire bed with a half moon edger and cut a crisp line the whole way around. Then I went back around again with the edger at an angle to cut a V shape (or in this case more of a moat) into the edge. 

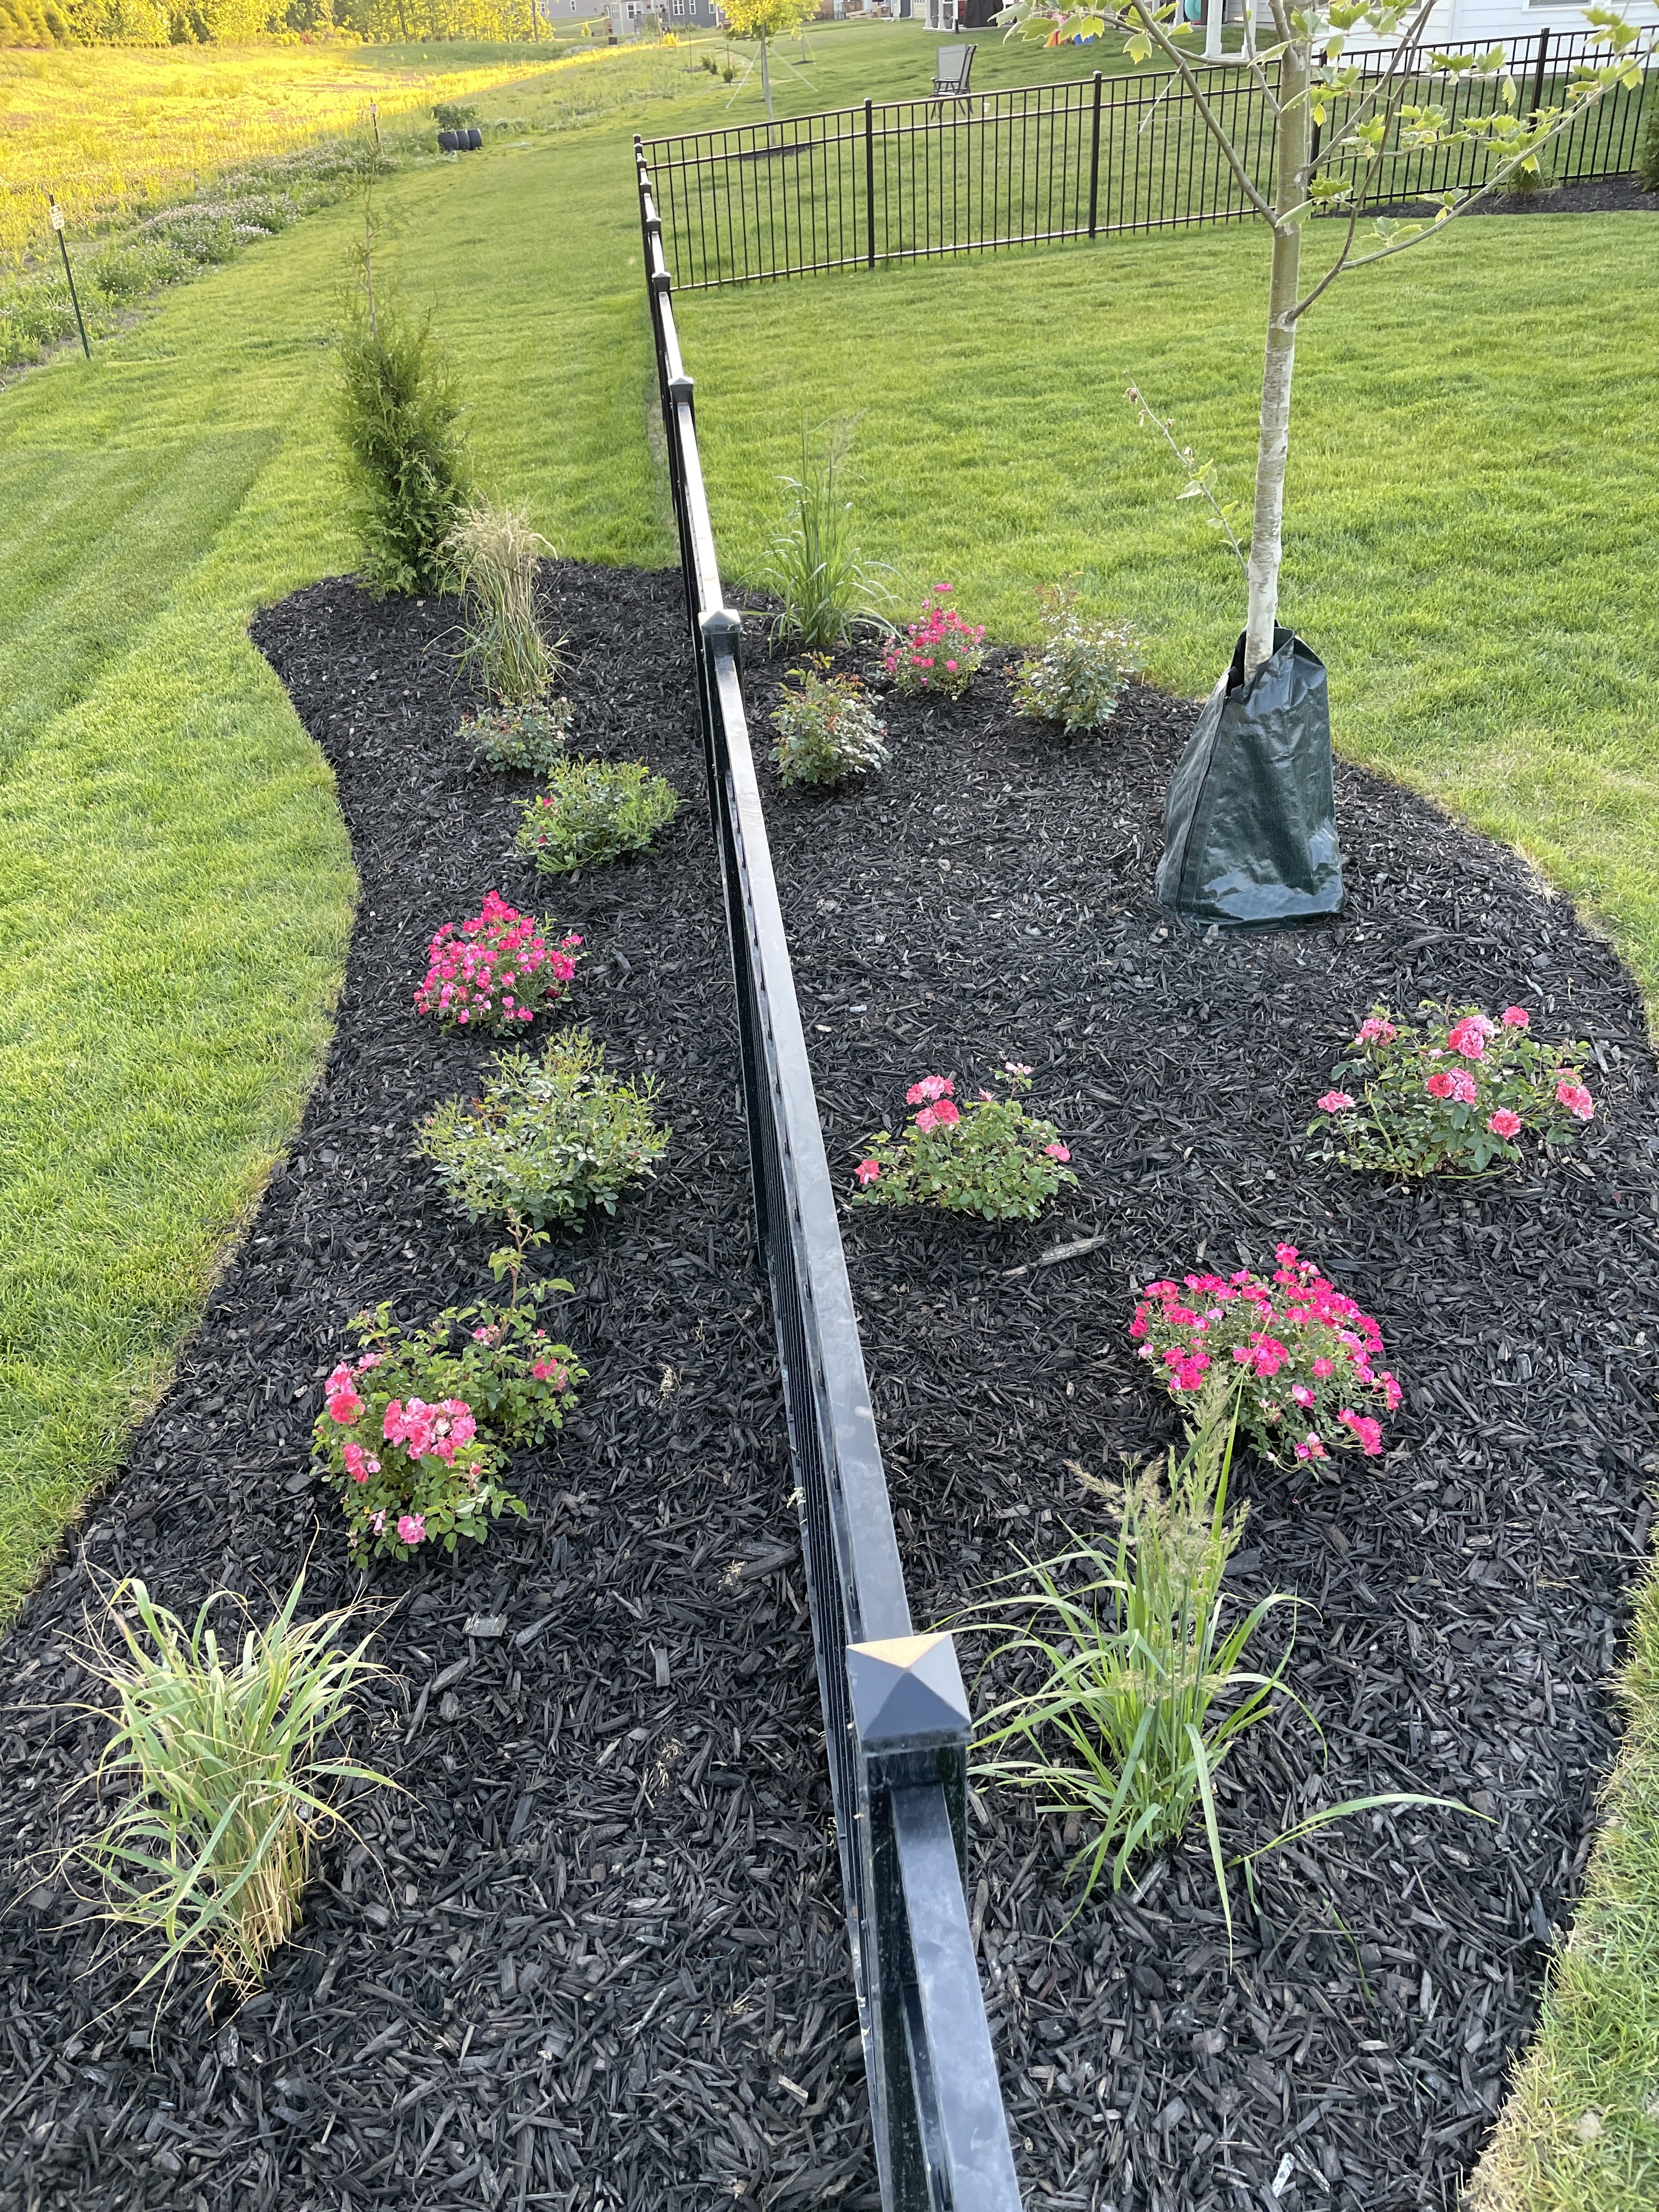
drift roses in mulch bed

The whole thing basically has a 2 inch deep moat around it cut below the sod line. When you then back fill it with mulch it comes up to a deep vertical edge that helps to keep the mulch in place and also helps prevent the grass from spreading into the mulch bed because it hits air instead of soil when it tries to spread horizontally. 

bed edge with air gap

So there you have it, here is a before and after photo. I just love how odd it looks having a perfectly sculpted patch of dead grass in the yard and then the after photo making it look like the mulch bed has been there all along. That's really the goal to make it look like it's natural or supposed to be there and now that you just came along and spilled mulch on top of the grass. 

before and after new mulch bed
Before and after