Saturday, January 31, 2015

Checking In: Delosperma, Ice Plant in Winter

Hardy in Zones 5-10, let's check in on my Delosperma ‘Jewel of Desert Peridott’ in winter before and after two snow storms and a bought of single digit temps.


Here it is on December 31 in Indiana - how did it spend its New Years Eve in Zone 5a?

delosperma indiana winter
Delosperma ‘Jewel of Desert Peridott’ - December 31, 2014 - Indiana Zone 5a

delosperma in winter ice plant
Delosperma ‘Jewel of Desert Peridott’ - December 31, 2014 - Indiana Zone 5a

Not bad! It still had most of its 'flesh' and was keeping red and green in the lower areas of the mulch out of the wind. This creeper really sneaks into crevices, I can't wait until it has a full summer to hopefully grow into a nice succulent green mat.

Now let's see it a month later, after two snow storms and one pretty rough week of single digit temperatures (luckily it was under the snow for that week!). Also, these photos were taken with my iPhone whereas the ones above were with my Canon T5i so color may be slightly different as you compare.

ice plant in winter close up
January 30, 2015 - Looks like at least one clump to the side, green and fleshy and completely un-phased by Indiana cold

ice plant in winter
January 30, 2015 - Pretty shredded on top, but notice the red and even green leaves still kicking low to the ground

ice plant in winter
January 30, 2015 - It really hunkers in there to stay out of the wind

Yep, the tops are looking pretty shredded. Anything exposed to the wind is crunchy and dry. But below, in the cracks low to the ground down in the mulch, I spy red and even green fleshy succulent leaves. This thing is definitely still kicking up here in Zone 5a. Like I said, it really has a knack for getting down down down into those crevices, and it's really paying off for wind protection.

Tuesday, January 27, 2015

Checking In: Succulent Propagation Week 3

After reading this AMAZING blog post about succulent propagation, I decided to try my hand at making little succulent babies of my own! That was about 3 weeks ago, and I was starting to worry that the leaves I pulled from the Aeonium haworthii Echeveria pulidonis weren't going to sprout babies. If you don't pull them off close to the stem you leave off the portion that is capable of regenerating.
 
succulent progress photos
Succulent leaves on January 2, 2015 (the 'before' photo)
 I put the leaves on top of the soil and let them callous over on the ends. I would drip a few drops of water onto the soil every few days after washing my hands - literally a couple drops each. I guess I was thinking that I would trick them into thinking it was raining and it might be a nice time to put down new roots - no idea if this did anything at all, haha!


I first started with leaf pieces, that didn't do anything. After doing more reading, this isn't surprising because the section of the leaf that is capable of reproducing new roots is on the very very base. I took cuttings from each of the 4 succulent varieties and tried to propagate them as well. I realized that not all succulents reproduce from leaflets.

So where are we now? After 3 weeks, here is some visible progress!

succulent progress photos
January 25, 2015 (progress 3 weeks)
succulent progress photos
January 25, 2015 (progress 3 weeks)
succulent progress photos
January 25, 2015 (progress 3 weeks)
In this last picture, notice the Cryptanthus bivittatus leaves that are just sitting there not doing anything. Yeah, I guess this technique doesn't work with them, so just ignore those!

What about the paddle plant, the Kalanchoe thyrsiflora. Well the leaves didn't do anything after I pulled them off, they just dried up. But the stump that was left behind did sprout some new leaves! I guess this type of succulent doesn't propagate from leaflets, but it looks like I could chop the stump into columns and get new plants from each.

baby paddle plantpaddle plant propagation new sprouts

I'm encouraged by the progress! My husband Chris hates looking at these pieces of plants laying in ramekins on the windowsill, so the sooner they look like real plants the better!

camera on tripod with succulent
On this project I also learned to use manual focus and a tripod to get better narrow depth of field photos

close up succulent photo


Saturday, January 24, 2015

Seeing ZZ Plants Everywhere


You know the expression that goes something like "if you buy a [kind of car] you start seeing [kind of car] everywhere!" Well the same is true for me with ZZ Plants [Zamioculcas zamiifolia]. I got one on sale at Lowe's for my house, and now I've seen them in hotels in Washington DC and Orlando within a 2 week period.

ZZ Plants Zamioculcas zamiifolia
A row of potted ZZ Plants [Zamioculcas zamiifolia] huge and attractive in 3 foot tall planters
ZZ Plants Zamioculcas zamiifolia
ZZ Plant - now that I own one I see them EVERYWHERE!

Found My Office Plant's Big Brother


I got a colorful narrow-leaf croton [Codiaeum variegatum 'Mammy'] during the adopt-a-plant event in the Campus Center at work. It's doing just fine on the windowsill in my office.

croton house plant
Croton - Codiaeum variegatum 'Mammy'
The entire plant is only about 7 inches tall up to the highest leaf, so it was sort of odd to see shrub sized versions of this plant in Orlando all around the hotel property.

maroon and orange leaves croton Codiaeum variegatum
Dark maroon with red tips in Orlando - Definitely a croton, not sure if it is my exact 'Mammy' cultivar, maybe the leaves get darker when they get more sunlight, or maybe my newer leaves are greener. Codiaeum variegatum 'Mammy'

dark croton leaves
Same shape as my Codiaeum variegatum 'Mammy' but maybe a darker cultivar??
It's fun being able to recognize plants that I know - that means I'm learning! One day I'll just be able to point at things left and right like boom, boom, boom, named it!

Friday, January 23, 2015

Checking In: Luna Red Hibiscus in January


Here is a short before and after (or after-and-before in this case) when my parents gave me a red hibiscus [Hibiscus moscheutos 'Luna Red'] that they were keeping in a planter. My dad said it would do alright in the ground, so I stuck it by the downspout in late fall. I'm hoping it comes back this spring! I only got to see ONE flower open on it so far!

red luna hibiscus in winter
Hibiscus moscheutos 'Luna Red' in January

red luna hibiscus in winter
Hibiscus moscheutos 'Luna Red' in January
Here are a couple photos from when I first put the hibiscus in, transplanting it from a container to the ground. It had a fairly warm wet Fall to hopefully develop some roots before drying up completely on top. I hope it comes back. I think this is my husband Chris' favorite plant we own, even though the tropical look doesn't at all match the north woods riverbed look I'm going for.

Hibiscus moscheutos 'Luna Red'
A couple progress photos from the day I put the hibiscus in the ground this last Fall. I used some leftover rocks from the front yard rock garden.

Hibiscus moscheutos 'Luna Red'
I documented the ONE and ONLY hibiscus bloom I saw, since I didn't get the plant until Fall it was all but spent for the season. It has a very tropical look to it, and nice color. Maybe I won't hide it behind a conifer afterall.

Identifying My Mystery Fern at Night in January

I have a mystery fern in my side yard shade garden. I got it this Fall for half price from Allisonville Nursery, and I love it. I was a little grossed out by the dark sori (the little black dots) but now I'm okay with them. I thought they looked like warts at first, I'm just not used to having dark sori. Sori I'm not sori!

wood fern in january
Trying to identify a mystery fern, in January, at night... extra difficult!


Anyway, I love my little fern - it's actually still green right now even after being under about a foot of snow for a week and withstanding single digit temperatures. There's only one problem, I don't know what kind of fern it is because it didn't have a tag, and that bothers me - it gets in my head and it bothers me.


So I tried to find out! The problem is there are tons of ferns out there and they all look the same, until you learn more and look closer. Some basic background on ferns is extremely helpful. So I surfed the web for about 2 hours and here is what I came up with...

wood fern sori
Prominent, dark, non-marginal sori - and I know it's hard to tell with the pinnule slightly bent but the 2nd is longer than the 1st here on the bottom right.


The Connecticut Botanical Society website was an amazing help, and so was TrekOhio! I quickly narrowed it down to some kind of wood fern because it has prominent sori and jagged pinnules. The sori aren't on the edges of the leaf, so I could eliminate marginal wood fern.

wood fern stipe
Sometimes the stipe (the portion of stem that goes from the root to the leafy fronds) is important to identification, here not so much. Notice here some of the fronds don't have sori - what's the deal with that? If some of the fronds are sterile that makes this dimorphic even though wood ferns are usually monomorphic.

wood fern in january
Fern symmetry can also be important to determine identity... here in January at night... I would classify this as messy

This still left 3 possible close calls! Was it the spinulose wood fern, mountain wood fern, or evergreen wood fern? What the heck? They sounded so similar. It gets even more technical...

"The difference concerns the configuration of the basal pinna. If the first lower pinnule is opposite and longer than the second, it is spinulose. If the first lower pinnule is alternate and longer, it is mountain. If the second lower pinnule is longer than the first, it is evergreen." - Hiker's Notebook (http://www.sierrapotomac.org)

 Similarly, this description was consistent:

"One way to distinguish them is to look at the lowest pair of leaflets (pinnae). On spinulose woodfern, the lower subleaflets (pinules) closest to the main stalk are longer than the next set further out. On intermediate woodfern, the second set out from the main stalk is usually the longest." - Connecticut Botanical Society

So here is my evidence for Dryopteris intermedia, the evergreen wood fern: it has (1) dark visible sori, (2) jagged pinnules, and (3) the second lower pinnule is longer than the first, and (4) the fern is green in January so the 'evergreen' fern makes sense, while the Dryopteris spinulosa is listed as deciduous.

Here is my evidence against it being an intermediate wood fern: (1) not symmetrical in growth habit, (2) some sterile fronds means it's not monomorphic.

What do you think? Did I get it right? Feel free to offer your comments below!

Update: After spotting an identical looking fern at a garden show, I now believe this fern is Dryopteris erythrosora and possibly as specific as Dryopteris erythrosora 'Brilliance' - I will be able to get some more info when my fern starts growing this spring because new fiddle heads are supposed to be pink.

Sunday, January 18, 2015

Identifying my Succulents with Google Images


I'm pretty handy with Google, but it still takes me a looooong time to search around until I've found pictures of plants that match the plants I'm trying to identify. For example, without too much prior knowledge of conifer varieties, I was able to more or less pin down the different types of trees I saw around my hotel.


Granted, I'm a bit anal when it comes to getting it right. I don't want to perpetuate mis-identifications, and I want to be as precise as possible. Sometimes, when I get plants that are labeled "various succulents" this is harder to do because it's up to me to search out the true identity.

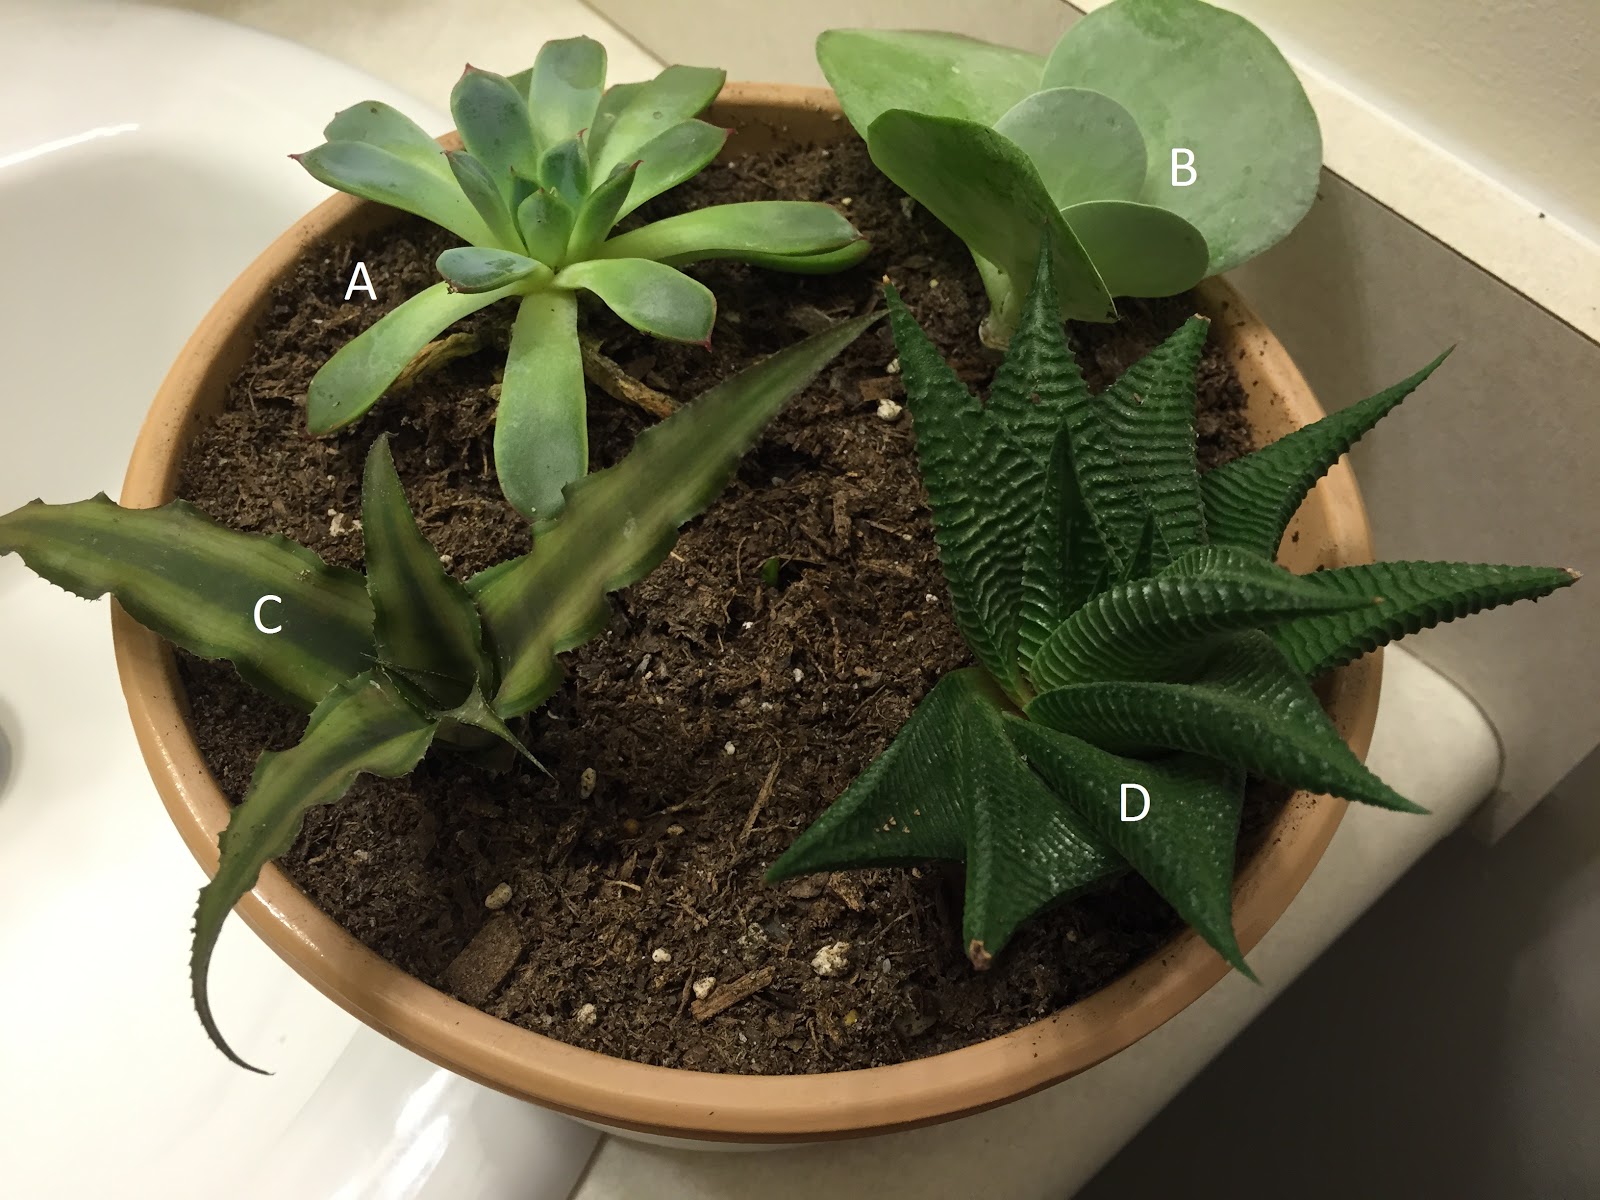
So here is the challenge, this pot of 4 different types of succulent plants. Let's begin!
help identifying succulents
Four 'various succulent' plants sold in a pot with no plant tags


I found a great gallery of succulent plants to browse through, looking for general characteristics such as the leaf shape. This actually helped a lot, and I was able to narrow down two of the plants: A and D with just this gallery.

A - looks most similar to Aeonium, but I wasn't sure what kind. The leaves are rather long and slim compared to others that are very fat and juicy. My best guess at this point is some variety of Aeonium haworthii. Update: After I found a labeled individual plant that looks exactly like mine at Lowe's, I discovered it was actually Echeveria pulidonis.

D - was a little more straight forward, the succulent plant gallery had one that looked pretty dead on - it's Haworthia limifolia. When I found it on Dave's Garden called "fairy washboard" I knew this was it from the description and the other photos. It's hard green ridges would make a perfect washboard for a fairy!

C - was easier because I sort of cheated - I saw a similar plant at Lowe's that was obviously the same species but a pink variety. I took a photo of the plant tag to remind myself what it was later, and when I looked it up online I knew it was some variety of Cryptanthus bivittatus.

B - took the longest to identify because it could be one of about 3 different things. It didn't look like any of the plants in the succulent gallery. I was just Googling around for common succulent houseplants and saw one that looked similar but it had red tips and mine clearly does not. It's some kind of Paddle Plant, and goes by many other names. Finally when I read an article that distinguished between the ones with red tips and the one that has "chalky green leaves" I was convinced that this was the one: Kalanchoe thyrsiflora.

succulent small green leaves Baby Jade Crassula argentea
I wish all plants came with tags like my Baby Jade [Crassula argentea]
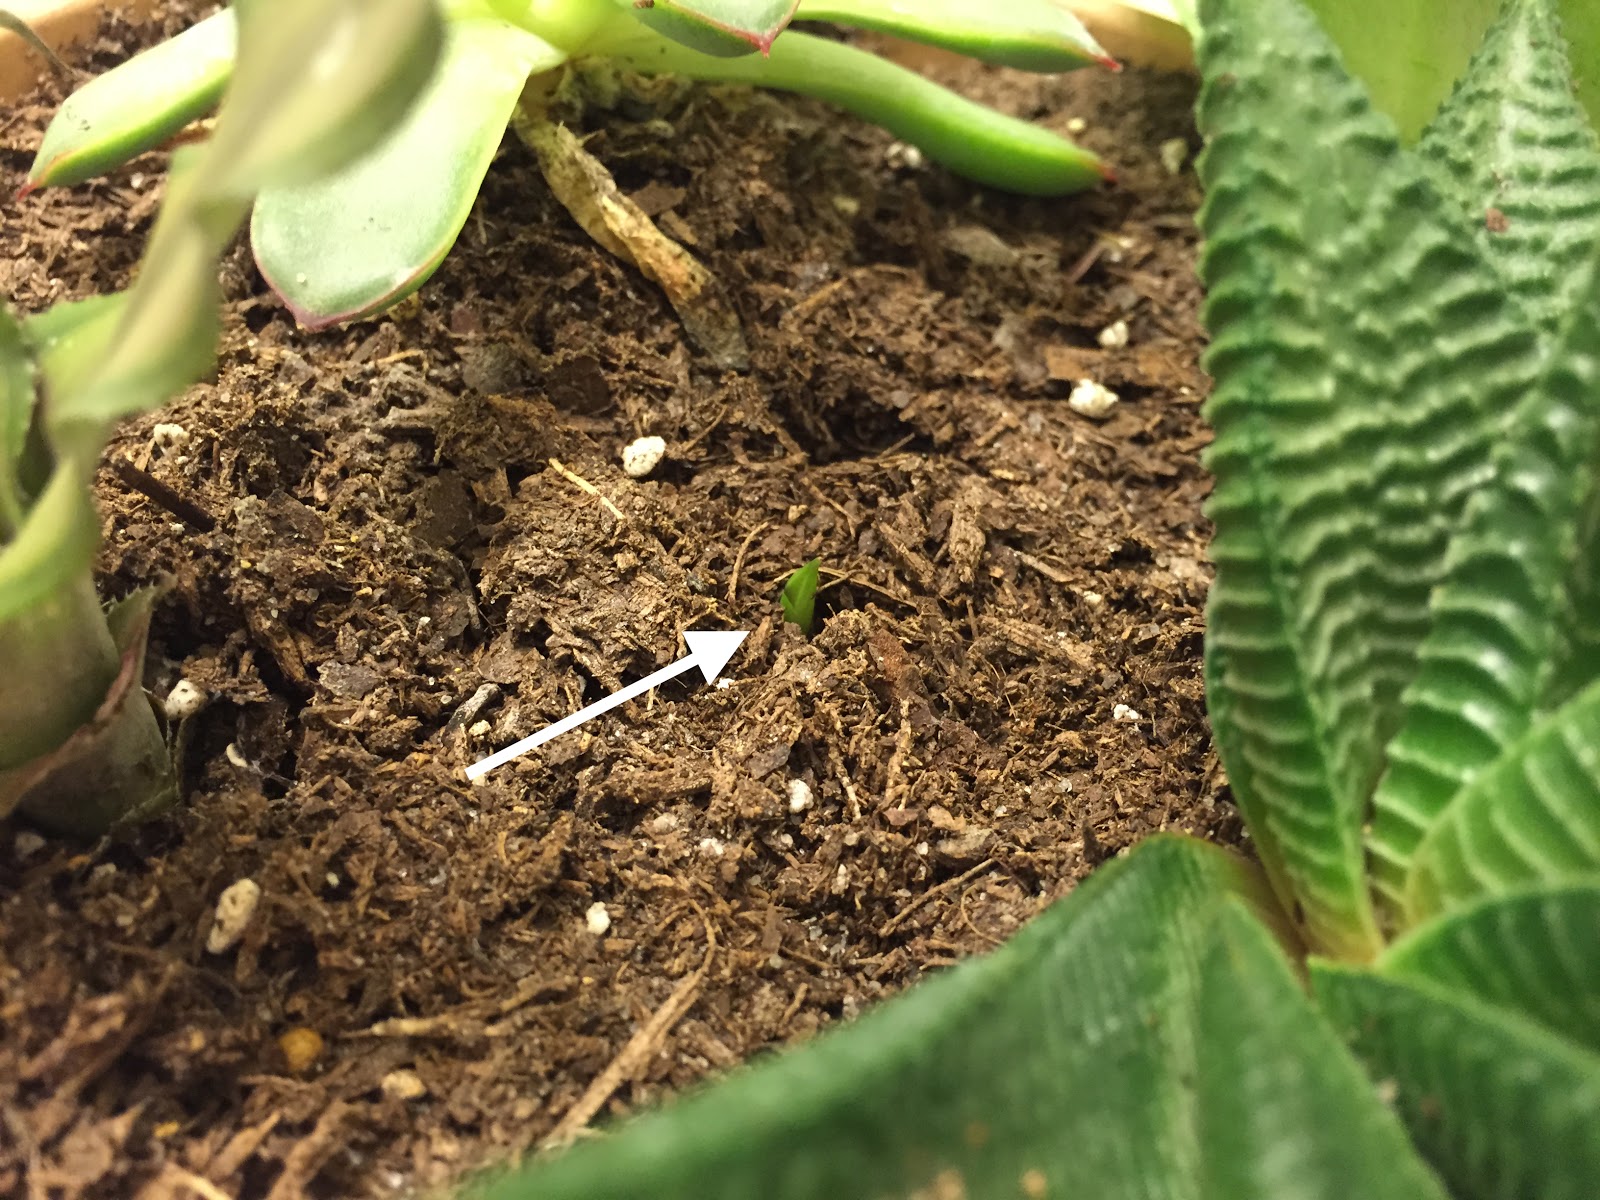
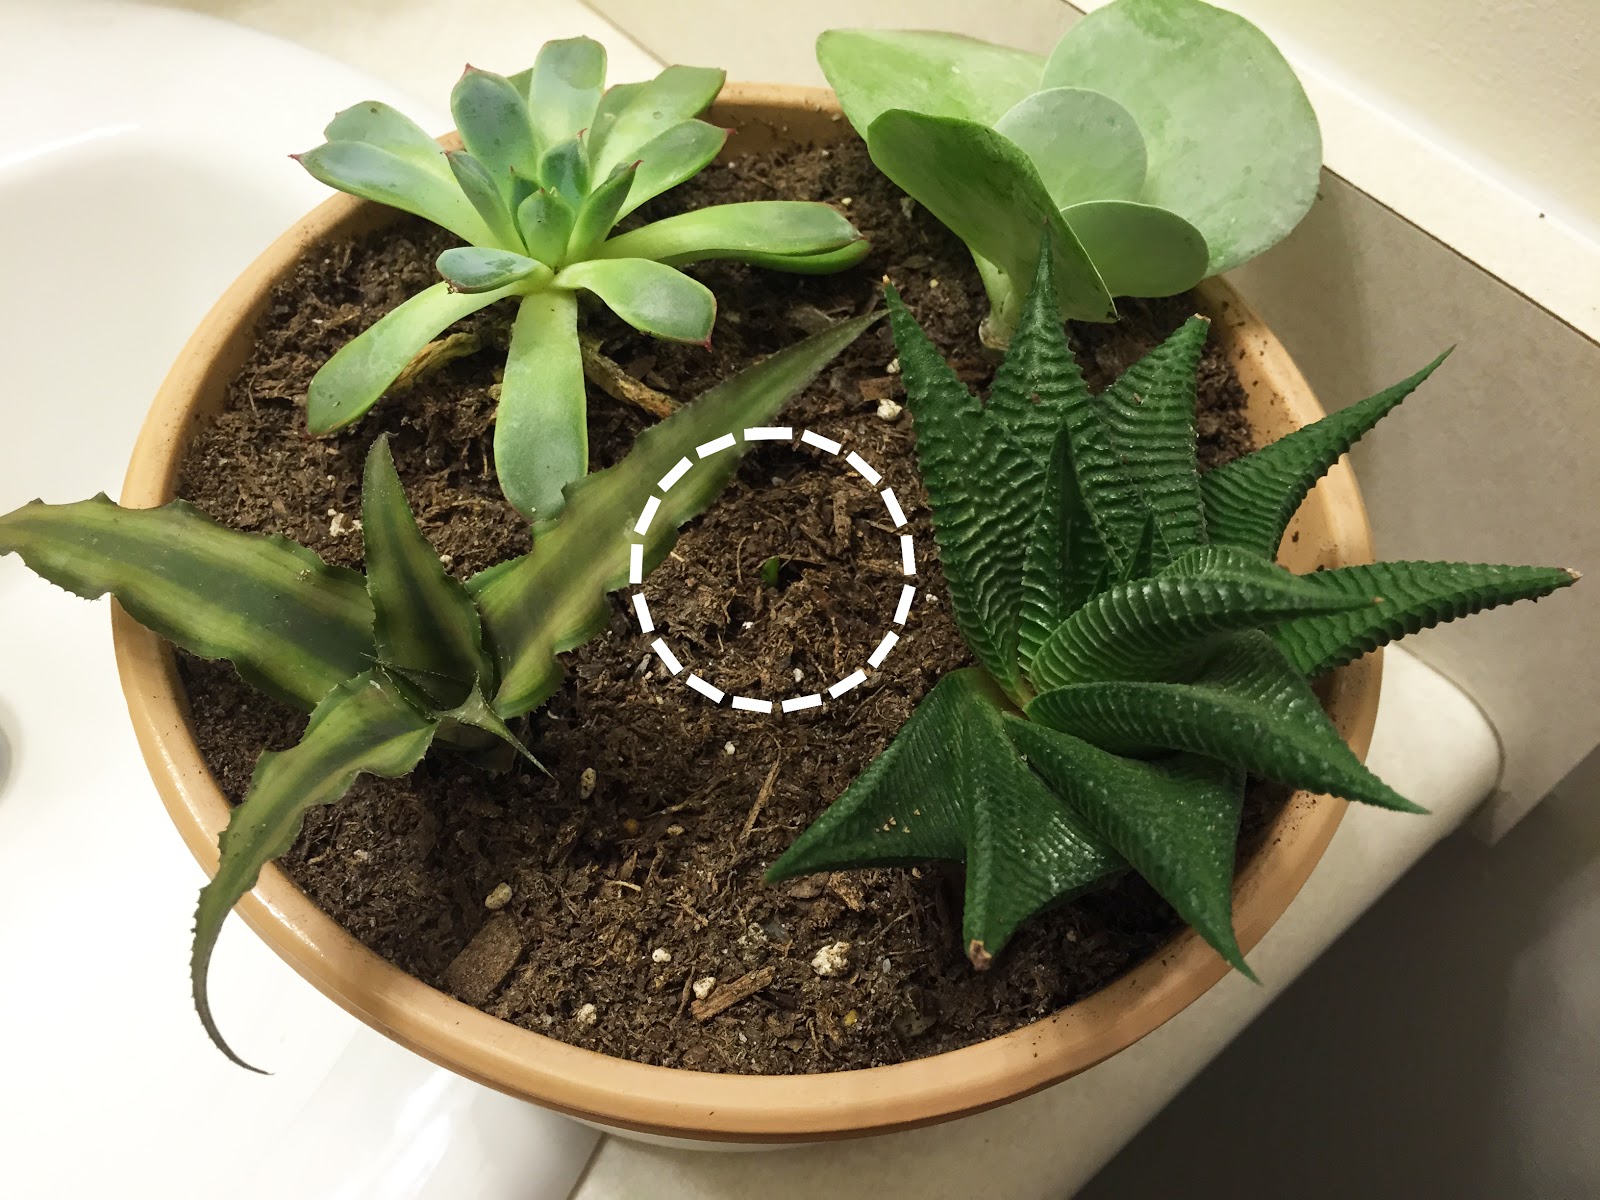
But wait! What's this? There's a tiny green sprout coming up in the very center of my succulent patch! What could it be? A mystery succulent baby!
identify succulents
But wait, what's this in the soil?
tiny succulent sprout
Mystery baby succulent coming up in the middle

My guess is that this will turn out to be a Haworthia limifolia 'fairy washboard' growing off of the roots of the other plant. The Haworthia limifolia has the largest root system of any of these succulents, which I discovered when I re-potted them. That is my best guess but time will surely tell!

Wednesday, January 14, 2015

Tropical Plants and Specimen Conifers at Gaylord National Harbor Resort


different kinds of conifer trees
A nice collection of specimen conifers at the Gaylord National Harbor!

The Gaylord National Harbor Resort and Convention Center has an amazing atrium filled with trees, plants, and water features. Many of the tropical plants look familiar yet somehow strange, because most are kinds you would see on an office desk - except these have grown to several feet tall. Take, for example, this huge ZZ Plant [Zamioculcas zamiifolia] just like the one on my bathroom counter - except this one was about 3 feet tall and wide!

zz plant Zamioculcas zamiifolia
Huge Zamioculcas zamiifolia by a water feature
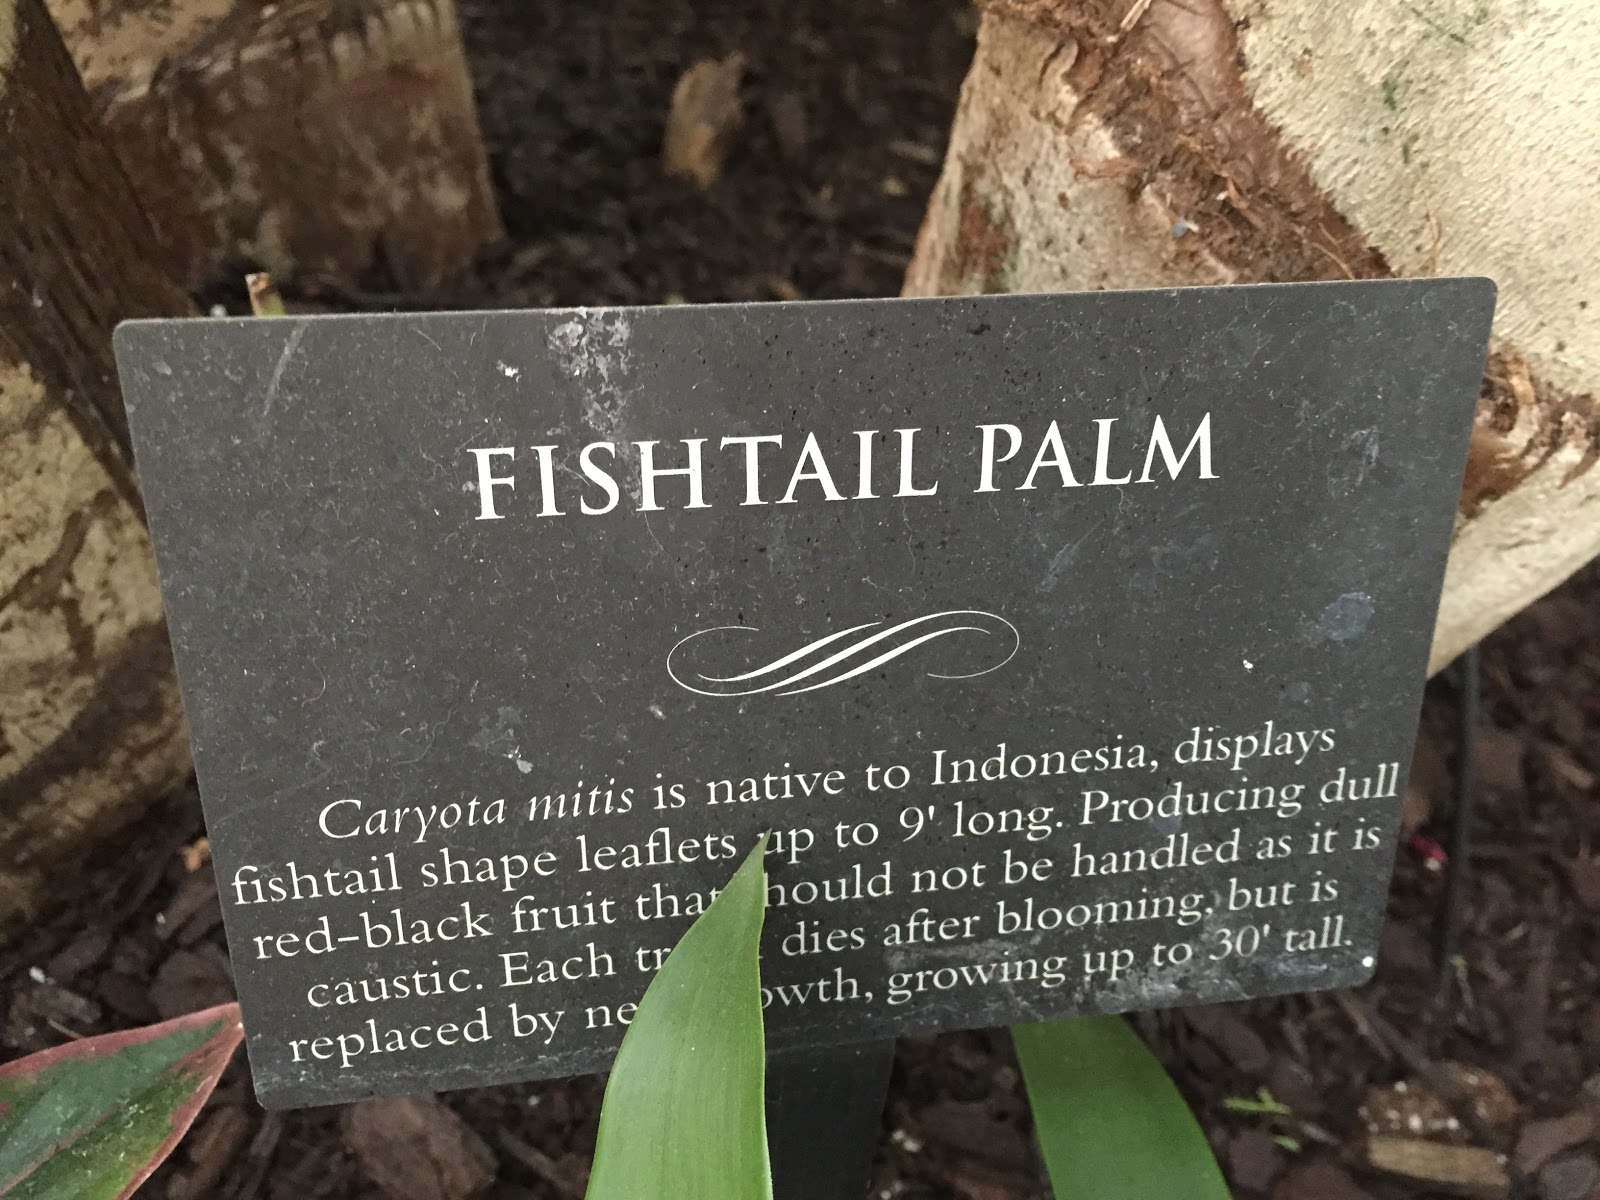
I had some time to kill before heading out to the airport, so I walked around and explored the atrium and some of the outdoor gardens. The most striking indoor plants were the huge Fishtail Palms [Caryota mitis] that surrounded the lobby bar. The name comes from the shape of the leaflets, but these palms also produce wispy broom-like tails on the sides of their trunks.

fishtail palm caryota mitis

fishtail palm caryota mitisfishtail palm caryota mitis

fishtail palm caryota mitis

fishtail palm caryota mitis

Stepping outside the waterfront door of the atrium (that locked behind me) I found a formal garden with conifer topiaries. None of the plants had name placards other than the Fishtail Palm, so I did my best to identify the trees using Google images and this helpful conifer identification article.

Chamaecyparis pisifera 'Boulevard' in cloud form
Chamaecyparis pisifera 'Boulevard' in cloud form

First up it looks like we have a large Chamaecyparis pisifera 'Boulevard' in cloud form. This specimen was easily 9 feet tall, and the focal point of the waterfront garden. The short blue floppy mop tips were nearly groomed into billowy fluff balls.

Weeping Blue Atlas Cedar - Cedrus atlantica 'Glauca Pendula'
Next up, also in the waterfront garden, this weeping blue atlas cedar [Cedrus atlantica 'Glauca Pendula'] had a 5" caliper trunk (eye-ball measurement) and stood about 7 feet tall. It's blue barbed wire needle clusters lined each whip-like branch.
Chamaecyparis obtusa in cloud or Hindu Pan form
Some kind of Chamaecyparis obtusa in cloud or Hindu Pan form

Walking up the service drive to the front (since I was locked out) I came upon an unknown variety of Chamaecyparis obtusa in cloud, hindu pan, or pom-pom form standing neatly in front of the main entrance. This specimen towered over me, at least 3 meters tall.

Chamaecyparis nootkatensis 'Pendula'Chamaecyparis nootkatensis 'Pendula'

Finally, framing the Chamaecyparis obtusa topiary on both sides were two weeping Alaskan cedar [Chamaecyparis nootkatensis 'Pendula'], with soft floppy fronds (needles) and standing 15 feet or more.


I did my best to identify these using images online, so I welcome any corrections or other input in the comments section! Thanks!

Friday, January 9, 2015

Neem Oil Got Rid of White Furry Fluffy Fungus on Soil in 24 Hours


When I re-potted a ZZ Plant [Zamioculcas zamiifolia] I got at Lowe's into a larger pot, I used some really old potting soil and everything got pretty moist. In a couple days, I noticed some white fluffy fuzz growing on top of the dirt. Interesting!

before and after neem oil fungus
White fuzzy powdery fungus growing on the potting soil. Treated with 0.9% neem oil spray. Before and after photos 24 hours apart. That was easy!


My friend Mike told me to try treating it with neem oil extract. I found a couple different ready-to-use sprays with neem oil extract (both had active ingredients of 0.9% 'extract of neem oil'). The fancy organic rose spray was about $9, and the Garden Safe Fungicide was about $5.

garden safe fungicide neem oil sprayrose rx spray neem oil


I sprayed just enough to dampen the top of the soil, and within 24 hours the fungus was totally gone! Completely gone!

zz plant in bathroom
ZZ Plant bathroom selfie! Whadup!


I looked up neem oil and it is basically vegetable oil from an evergreen plant originating in India. Quite the natural fungicide! My ZZ Plant is super happy in my bathroom!

potting soil in kitchen
Re-potting in the kitchen! I have the best husband to let me do this :)

Tuesday, January 6, 2015

I Just Want A Moss Rock! Trying Both Slurry and Transplanting

I'm dreaming of a moss rock to make my rocky north walk look very zen and peaceful, and to make it look like my rock has been there forever and not just plopped there last summer after finding it in a construction site. Is that too much to ask? After reading a few moss graffiti posts, I got SUPER pumped and excited, and knew this would be my answer! (Spoiler alert: It wasn't).


Have you noticed that there are never any progress photos that really show the moss growing into a lush graffiti word? Everyone starts a post the same way, with the instructions for moss graffiti and a picture of them painting muck on a wall - but nothing showing the actual process of the moss growing in. This post I can definitely relate to after misting my moss twice a day for about 5 weeks straight and getting nothing to grow.

The cynic in my wonders if all those great moss graffiti photos aren't just transplanted moss stuck to the walls and cut into shape!! Either that, or I started my project too late in the fall on October 25.

close up of moss
My moss slurry attempt, starting with this huge bowl full of moss gathered from north slopes in a field.
moss in bowl
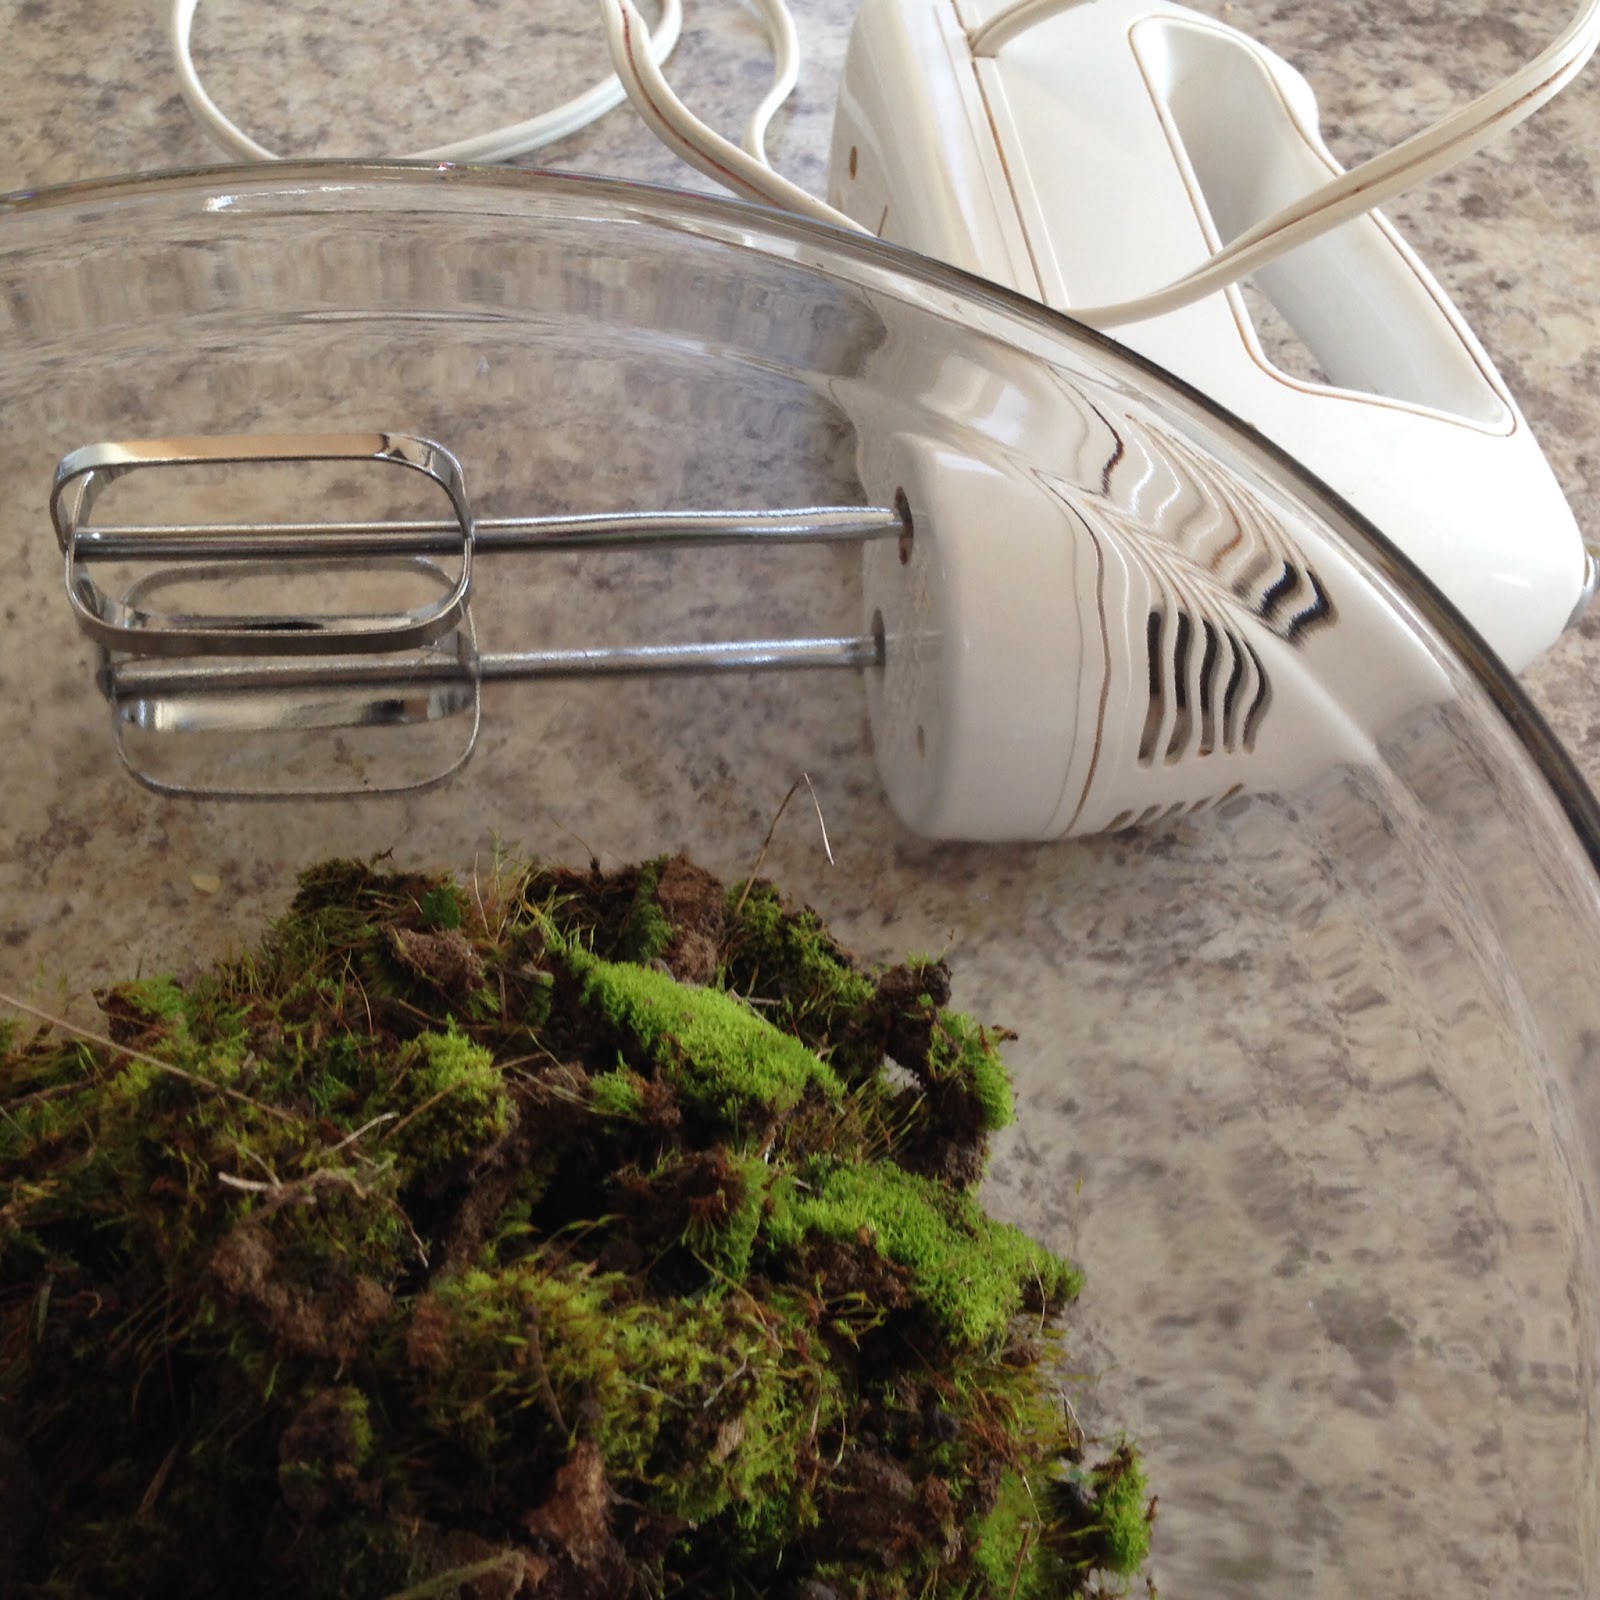
I mixed it all up in a bowl with water and plain yogurt according to some directions online.

yogurt moss slurry
Looks like a chunky milkshake. The egg beater didn't really pulverize the moss, but it broke it down quite a bit.
yogurt moss slurry on rock
I started spreading it onto my nice porous rock with a spatula, end switched to just gobbing it on with my hands.

yogurt moss slurry on rock
The yogurt helped the slurry stick to the rock, even on the vertical sides. I packed it on good and thick with chunks of moss in it, hoping some would start growing right away.

moss slurry rock looks like mud
After a couple days of misting constantly to keep it damp, the contours of the rock started to show through again. It stayed cool and shaded on the north side, and I kept misting it twice a day. It started to smell like rotting yogurt after a couple days.
My "moss rock" looks like a big turd. I found this amazing video explaining the life cycle and reproduction of moss, and I convinced myself that any day I would see a green slime of protonema spreading over the rock. It looked so good in my head!


I even kept my yogurt moss slurry safe from the rain with a little rain coat! I didn't see any results, and I lost hope. I'm not the only one, check out this episode of Man vs. Pin. All of those posts and videos you see about moss graffiti never show the progress photos, they only show these yahoos mixing it up and promising to check back later. Does moss graffiti even work?? In theory yes, you can use slurry to propagate moss in your yard, but it certainly doesn't seem to grow in the perfectly cut out designs you see online.

I decided to pull a Mythbusters and "replicate the results" rather than following the ideal process. I just wanted moss on a rock!

Giving my slurry some TLC to keep it safe from the rain. You can't say I didn't give it my all!

Giving the Transplant Method a Try

I went home to Ohio for Christmas - a lot of time had passed since I started my moss rock project in October. My dad told me about a huge patch of moss on a public pedestrian path between two roads. I went to check it out and saw a huge carpet of very shallow leafy spreading moss apparently growing on just an asphalt path. 

moss on asphalt path
Outline of moss patch I scraped up with my dog to scale. I'd say about 3 square feet of moss. I rolled it up like miniature sod, it had a thin layer of scum on the bottom that was sitting on top of the asphalt. The biggest chunk I got was about 12 inches long on its own!
two freezer bags of moss
I brought two freezer bags full of moss back to Indiana with me.
dark green fuzzy moss rock
I put it on the rock that night, I couldn't wait. I wet the rock and the moss and pressed the thin layer of scum into the pours of the rock, wetting it and pressing it into the crevices to form to the shape of the rock.
moss in front yard rock garden
It only took 1 bag to completely cover the rock. I was happy it stayed on, even on the vertical sides. The thin layer of scum was holding it to the rock, hopefully letting it grow into place and hold on.
moss on rock
After a light rain I was optimistic that this moss transplant would hold in place, even though it was already late December! I figured it was winter hardy moss since I found it bright green on the path in the middle of winter.
moss and rock garden
I had enough left over in bag number 2 to add moss to my backyard rock feature. If I can keep this alive I can use it to patch the rock, or let it grow in the shadow of these rocks looking all cool! I'm a little worried it won't grow on mulch since I found it on a solid path. It might prefer a more solid surface.

Hopefully this takes, it definitely has the look that I've always (for a few months) wanted. It looks like it grew right on the rock, so maybe if it holds tight and grows into place it will be convincing! If it takes off and grows a lot this spring I might take some extra moss and start some other rocks. I really like this look!