Thursday, June 17, 2021

New Plants Around Utility Boxes

I'm no stranger to hiding utility boxes with plants to not only make it more attractive but also make it easier to mow around. Before I did this utility box landscaping my neighbor said he was coming out with scissors to cut the grass in between the power box and internet box in the front yard. 

plants around utility boxes

utility box landscaping photos
Here is an After photo from October


At our old house, I had a great utility box combination of feather reedgrass, coneflower, iris, and asters. I wanted to try something a little different here because all of those plants die to the ground in the winter and only do a good job hiding the utility boxes for 7 months out of the year. So I wanted to do something evergreen this time but I didn't want to have to wait years for it to grow either. 

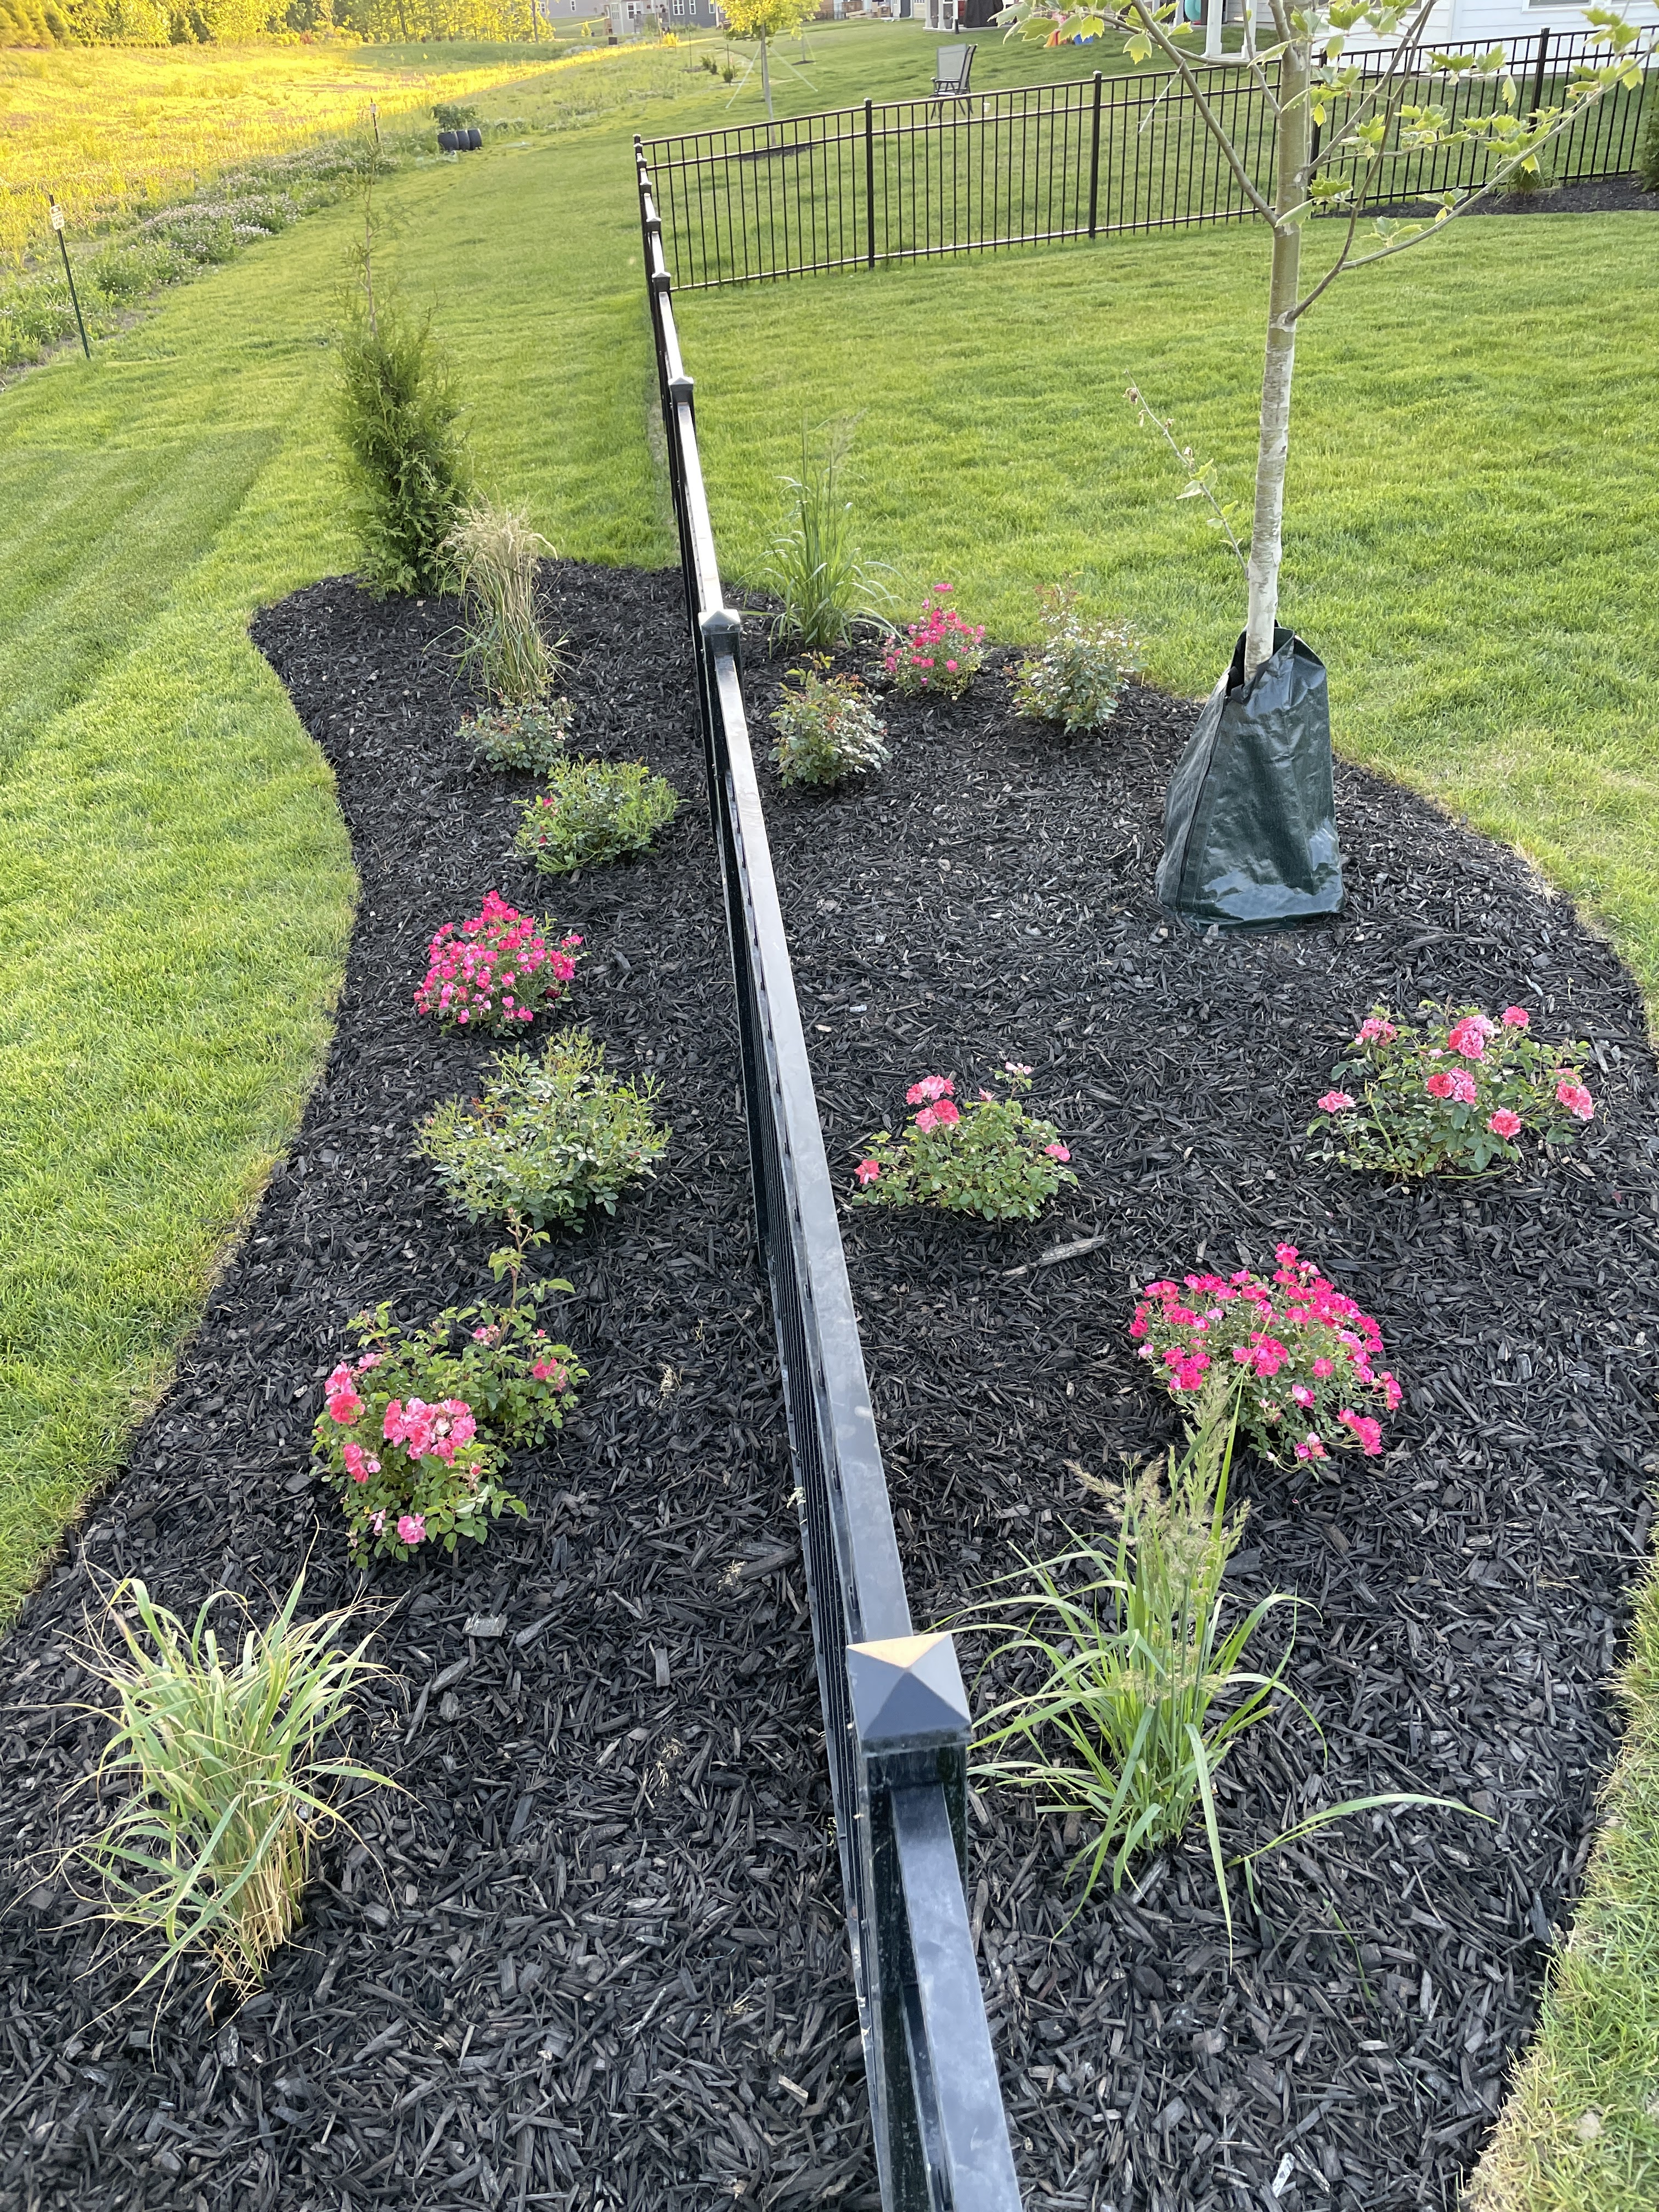
My compromise was to plant one emerald green arborvitae in the front that will eventually get 4 feet wide and hide most of the boxes from the front view, but in the meantime I wanted to hide the boxes from the side so I used one of my favorite ornamental grasses 'Northwind' switchgrass. 

'Northwind' switchgrass

I also got a few drought tolerant flowers called Gaillardia aristata 'Spintop Copper Sun' that won't really get tall enough to hide anything but they are blooming like crazy and don't need a lot of water. 

Gaillardia aristata 'Spintop Copper Sun'

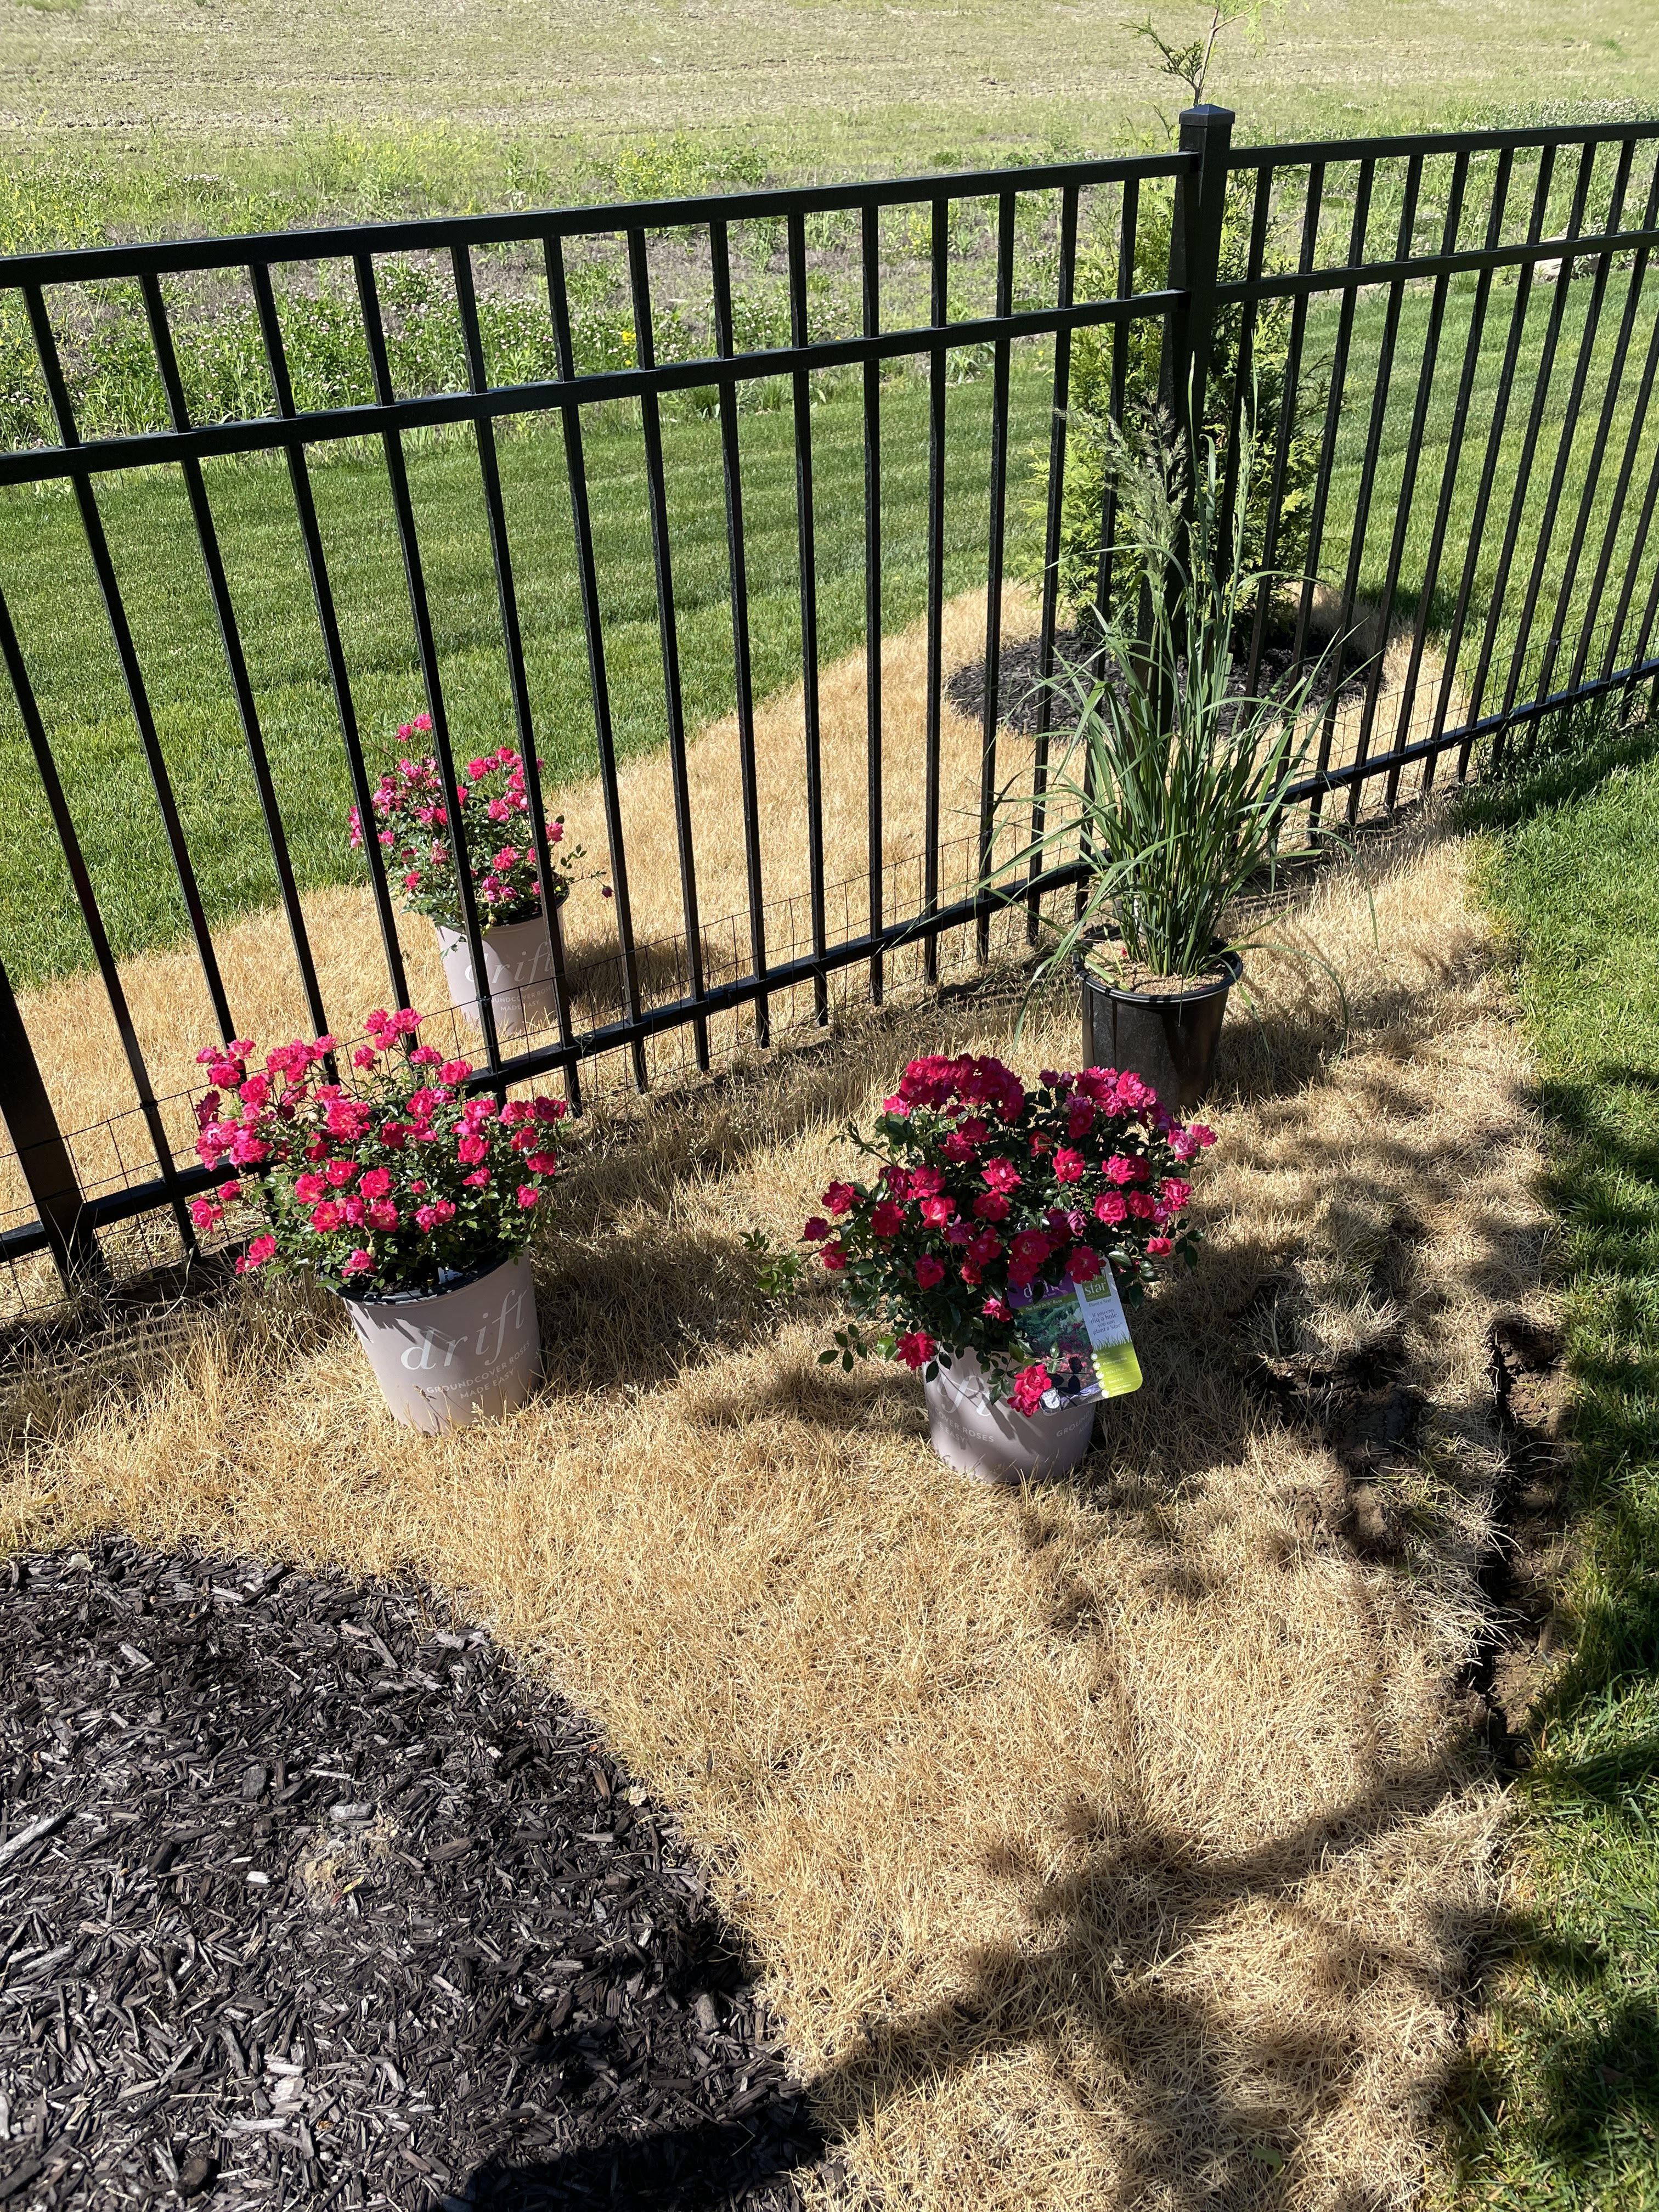
I started by rounding up the grass in the shape of the bed using a hose as a guide for the shape. I waited about a week for the grass to fully die and added a very thick layer of mulch. I called 811 before the dig to mark the utility lines, but since my mulch was so thick I actually didn't even dig into the ground I just pushed the mulch aside, added topsoil and the plants are all planted above the clay soil in nice mounded topsoil and surrounded by mulch. 

arborvitae emerald green

I don't have anything in the back yet and I'd still like to add some coneflower, but for now at least I don't have to mow between the boxes and it looks a little better. The plants are so small that they aren't completely hiding anything really, not yet anyway. 

Monday, May 31, 2021

This Is How I Start a New Mulch Bed from Scratch

How do you start a brand new mulch bed over grass for the first time? Here is my method that I've used a few times but it's certainly not the only way to do it. I'll show step by step photos and talk about the pros and cons of this method compared to other ways to do it. 

The very first thing I like to do is to visualize the shape of the bed by laying out a garden hose in the shape that the bed will be in eventually. I like nice gradual curves, so a garden hose is the perfect outline to start planning, then you can step back and make sure you like it. 

Using a garden hose to plan out the shape of the new mulch bed

I'm glad I did this because when I took a step back I realized I wanted more of a concave curve at the top rather than convex to basically make the whole thing look like a kidney bean or fat boomerang. The kidney bean shape is very common in landscaping and the gradual curves are pleasing to the eye. The benefit of the curve on the high side of the yard is that water will flow around it on its way down hill. 

My next step while the hose is still in place is to just nuke everything with roundup. You could also edge around the whole thing with a half moon edger and peel up the sod, but this grass has been growing here for a few months and the sod is really hard to dig up. Plus I want as much topsoil as I can get in the new bed so I don't want to remove the sod layer I want to keep all that material in the bed and even build it up from there. 

I let the roundup start to take effect before removing the hose to make sure I have my outline. On a hot day in direct sunlight, the roundup should have a noticeable impact on the grass even in a couple hours. 

hose shape of mulch bed
Remember to rinse your hose off because now it's covered in RoundUp

The next morning it looked like this...

Shape of new mulch bed in dead grass

I did have to go back and touch up a few parts with extra grass killer, a few days later it was evenly crispy. I let it stay like this for about a week and a half - I didn't want to plant anything into a bed of roundup right away. I wonder what the neighbors thought with this big bean shape patch of dead grass. 

Shape of new mulch bed in dead grass

Next we bought a bunch of plants to fill the bed, in this case we got a few colors of Drift roses. Knowing I wanted to raise the bed up a little above the sod line, I dug shallow holes for the plants and mounded fresh topsoil mixed with peat moss around them. 

arranging plants in new bed shape

Having the shape of the bed outlined in dead grass made it easy to arrange the plants how I wnated them. It's at this point I also went around the entire bed with a half moon edger and cut a crisp line the whole way around. Then I went back around again with the edger at an angle to cut a V shape (or in this case more of a moat) into the edge. 

drift roses in mulch bed

The whole thing basically has a 2 inch deep moat around it cut below the sod line. When you then back fill it with mulch it comes up to a deep vertical edge that helps to keep the mulch in place and also helps prevent the grass from spreading into the mulch bed because it hits air instead of soil when it tries to spread horizontally. 

bed edge with air gap

So there you have it, here is a before and after photo. I just love how odd it looks having a perfectly sculpted patch of dead grass in the yard and then the after photo making it look like the mulch bed has been there all along. That's really the goal to make it look like it's natural or supposed to be there and now that you just came along and spilled mulch on top of the grass. 

before and after new mulch bed
Before and after


Sunday, May 9, 2021

New Additions: Inkberry, Castle Spire, and Bird's Nest Spruce

We've been trying to figure out what to do with this front bed, and maybe it's the slow cold spring we're having or the fact that we're already looking forward to Christmas this year, but we're going with a mostly broadleaf evergreen front bed with different kinds of holly. 

We're already a week into May and the lows are still hovering around 34°F at night. I'm so glad I didn't order a bunch of perennial flowers because I'd be frantically running out to cover them every night. That could be why the prospect of a holly garden was so appealing. 

We also had a stroke of luck or catalyst push us to action, we were going on a walk and decided to go down the side street that is still under construction and saw a bunch of holly pushes on the curb. I asked the owner if he was just throwing them out and he said yes, so we ran to get the RAV4 and loaded up 4 free American holly bushes (and 3 forsythia that we don't know what to do with). 

These new bushes were the catalyst that made us go to Lowe's for topsoil and mulch, and then I found Shamrock Inkberry that we've actually been on the hunt for for about a week (we bought the only 2 they had), and Chris saw these cute blue holly called Castle Spire (Ilex x meserveae 'Hachfee'). Chris helped and we planted all of them along with 3 of the 4 free holly that night before the rain started. I also got my bird's nest spruce in the ground that I knew I wanted I just didn't know where to put it. It will get much bigger than the current spot allows but it will be years to go. 

plants in pots with shovel before being planted
Left: free American holly shrub, Shamrock Inkberry, Castle Spire blue holly

plants piled in back of SUV
Free plants loaded up in the back of the car (that Chris just got done vacuuming out)

holly shrubs under window
Two additional free holly shrubs under the window in the front side bed

Shamrock Inkberry (right) and Castle Spire holly (left)

Bird's Nest Spruce
Bird's Nest Spruce

I hope the spacing is adequate, I hear the holly can get pretty big - but we are excited to have some variety in our mostly broadleaf evergreen front bed for Christmas lights, red holly berries, and year round structure. 

broadleaf evergreen landscaping plants
Hoping for year round structure in a front bed that will never die to the ground


Wednesday, April 28, 2021

Western Cedar Side Bed

My dad brought me 5 beautiful western cedar to create a small screen for the side yard and two for the bottom of the yard as accents. I love them, I can't wait to see how fast they grow. They smell great and also remind me of how TV shows use these fast growing trees in the backgrounds of scenes to make it look more wooded. 

I used a hose as a guide to shape a gradual curved bed, then edged the whole thing with a half moon edger. I got a few pieces of sod up successfully, but it was slow going. I eventually got tired of it and took the lazy approach - a combination of burying the sod upside down and spraying the grass with a quick pass of grass killer. I should have learned back in 2015 that the upside down sod method does not really work, but I was too tired to rip it all out and haul it somewhere. 

western cedar bed
Final product, western cedar screen bed

using hose to shape bed edge
I used the hose as a guide to plan out the shape of the bed

ripping up sod to form a mulch bed
Slow going trying to rip up the sod that had already rooted in

Finally have more to look at in the yard with a boxwood bed and cedar side bed


Snow in Indiana April 21, 2021

It looks like this is the last hoorah for cold weather before it will really become spring here in central Indiana. I know in the past few years we usually got at least 1 snow storm in April but I was starting to think we would avoid it this year. Sure enough, temps got down to like 25°F and we got a few inches of snow accumulation. 

I got a nice snowy photo of the front of my house on the way to work though, and by the time I got home in the afternoon it had completely melted and was warm outside. Sheesh! Just one last test for the leaves that were starting to emerge, it seems like the leaves are slow coming out this year. 


My newly planted pyramidal boxwoods in the front got some snow

Newly planted western cedar in the side of the backyard covered in snow

Moved two western cedar that I hadn't planted yet onto the covered porch to stay warm


ZZ Plant Flower

Do ZZ plants have flowers? If so, what do they look like? I've had this Zamioculcas zamiifolia houseplant for years and it's never flowered before until just now! 

The flower looks similar to a peace lily, with in inner stalk that's not all that attractive that emerges from a sheath or hood. Ready for some science? I looked up both the peace lily and ZZ plant on Wikipedia and sure enough both plants are members of the family Araceae, also known as the arum family or aroids. That explains the similar look - they are somewhat related. 

The stalk in the middle of the flower is known as the spadix and the hood around it is called the spathe. Both are clearly visible in this flowering ZZ plant photo that I just took. Pretty cool!

photo of zz plant flower
Close up photo of the ZZ plant flower. I've owned ZZ plants for years and never saw one until just now!

In case you are curious, the flower has no noticeable smell from what I can tell. It looks sorta alien because it's not something you see all the time on a ZZ plant. They can be cut off without really hurting the plant but I'm going to leave it. 

A wider photo of the ZZ plant flower showing its size and location relative to the rest of the plant.


Saturday, March 20, 2021

Loving These Greenscapes Tree Watering Bags!

This is the first spring for my baby trees that were put into this new construction lot in October. I want them to grow as fast as possible because we moved away from the other house we built just as the trees were getting big enough to really enjoy, and now we're starting all over. I also feel very competitive and need my trees to live and grow faster than my neighbor's trees. 

greenscapes tree watering bags

At our old house, we had 3 trees and I could easily slow water them with the hose in an afternoon. Now with (adding them up in my head) 6 trees in my yard and another 3 in the common area next to my house, slow watering with a hose isn't really an option. 

Oh, did I mention that I'm going to baby the trees on the hill that aren't even mine? Yeah I figure even though they are in the common area, my house is the only one that borders them and I have a huge incentive to make sure they grow gorgeous and huge. It's a great situation and one of the reasons we liked this lot so much, we can enjoy these trees but not have to pay for them if they get damaged or need limbs removed down the road. 

green bag on tree to water

If you don't know about tree watering bags, the idea is that you can fill them up quickly with water and then the water slowly seeps out into the root ball where it is not wasted to runoff and all 20 gallons of water go exactly where you want it to. The bags also prevent some loss to evaporation, and while they are around the base of the tree can help protect from being hit by lawnmowers and help to regulate temperature during periods of repeated freezing and warming. 

bag at base of tree to fill with water

To install, you just put the bag around the base of the tree like a little jacket and zip it up one side. Then fill the opening at the top and the horse shoe shaped pouches fill with water surrounding the trunk of the tree. In about 6 hours the water slowly drips through the bottom of the bag slow watering the tree. It takes a couple minutes to fill each bag, and then I can sit back and watch them get a slow drink the rest of the day without constantly moving the hose and adjusting the flow from tree to tree. 

tree watering bags in front yard

Plus, an added bonus, I kinda like the look - I hope it makes the neighbors stop and ask "wait, what does this guy know that I don't?" Tree watering bag flex!

Establishing a New Landscaping Bed from Scratch

Spring is here! It's so exciting to again have a blank canvas yard in a new construction house. It looks like the sod is waking up and that it survived the winter even though it was installed in late November. From what I can tell all my trees made it as well. This blog post is about shaping and creating a brand new landscaping bed from scratch where there was only grass before. 

new sod waking up in spring

new sod waking up in spring

photo of the back of navy blue two story house

My dad and I have been plotting this winter, and he drafted me up a plan for what to do with the blank backyard. This first bed I'm installing is going to wrap around the morning room facing south, and will eventually have boxwood and a Sweet Bay Magnolia on the west side facing the neighbor's house. 

landscaping plans

The plan was to cut out the shape of the bed, remove the sod, and repurpose the sod to the bottom of the yard where they seeded but the seed all washed away. It was still easy to see the outline of individual sod pieces. They were relatively easy to pull up and roll, but the grass roots had already started gripping into the clay soil beneath. 

removing squares of new sod showing dirt underneath

before photo showing where landscaping bed will go

repurposing sod at bottom of yard

After hours of rolling up sod that had started to root in, I would develop an overuse injury in my wrist. A landscaping injury! I ended up buying a brace and everything, it got pretty bad and was sore for a whole week. 

To shape the bed edge I'm using a flat edging tool rather than a shovel that has a curved shape. Sometimes I lay out a hose on the ground to map out the shape ahead of time and then cut along it, but for this bed I just eyeballed it and tried to follow straight lines. In hindsight this is actually my first straight bed edge, I'm usually a fan of the gradual flowy line shape, but I think it's growing on me looking slightly more formal and tight.

shape of new landscaping bed before adding topsoil

shape of new landscaping bed with sod removed

back view of house half way through project

After cutting the shape, my next task is moving the internet cable that is buried exactly where the roots of boxwood shrubs are going to go. I'm kicking myself for not just burying it myself. After the internet company comes out and they say they'll be back to bury it and it takes them like 6 weeks - I should have just put it where I wanted it, because now it's exactly in the wrong place and it's a pain in the ass to CAREFULLY dig back up and move 2 feet. 

photo of buried internet cable in dirt

digging a trench to remove a cable

putting cable next to house to keep it safe

backyard bed before adding topsoil

With the cable safely tucked up against the house, it's in a place that no shovel or plant will ever touch. On either side I put a rock on my bed edge so that I know not to chop down there with a spade. I like using rocks for decoration and to remind me what's underneath. I cut a straight edge down so that the mulch will eventually slope down meeting a wall of earth, rather than simply being on top of the grass. This will discourage grass runners and shoots into the sod without installing a landscaping fabric or metal border.

backyard bed edge before mulch

Next it's time to amend the soil. I asked my dad if I should rent one of those soil tillers and he said with the clay don't bother, just work on building up the bed with some good topsoil. This back bed is 4.25 feet deep and 25 feet wide in the back, and 6 feet deep and 12.5 feet wide on the west side. That's a total of about 180 square feet! 

bags of mulch and topsoil in back of SUV

not enough topsoil

adding topsoil to new landscaping bed

I ended up making two trips to Lowes loading up the SUV, in total I got 12x two cubic foot bags of mulch, 10x 0.75 cubic foot bags of topsoil, and 10x one cubic foot bags of topsoil. I definitely could have used more topsoil, and the bags of mulch were barely enough for a dusting across the whole thing. In retrospect, using a mulch calculator, I should have gotten at least 15x two cubic foot bags of mulch for 180 square feet for a 2 inch layer. 

black mulch in new landscaping bed

black mulch in new landscaping bed

finished product new landscaping bed

Wonderful! Now it's time to ice my poor forearm from all the sod ripping and mulching. This year I'm not installing any plants until it's done freezing. I was fooled last year and ran out to buy hydrangea in March only to have them freeze in early April. That will give this new bed time to settle and I might even add more topsoil and mulch on top before actually planting in it. 

Project Total: $90.13 in mulch and topsoil